Easy DIY: Handmade Letter Banner
I saw a banner online and immediately had the thought: I could make that, and it would be cuter. So that is exactly what happened. With craft paper, paint, and Mod Podge, this turned into a handmade letter banner that feels whimsical, personal, and fast enough to finish before a shipped version would even arrive.
This works perfectly for Easter, but this craft will end up in all my upcoming parties: birthdays, Cinco de Mayo, summer bashes, Christmas, you name it.
Prefer a short video? You can watch the process to make these banners here.
How to Make a Handmade Letter Banner
This is one of those projects that is pretty simple once you start.
What you need:
Paper for template piece
Craft paper
Paint
Mod Podge
Scissors
Yarn, string, or hemp cord
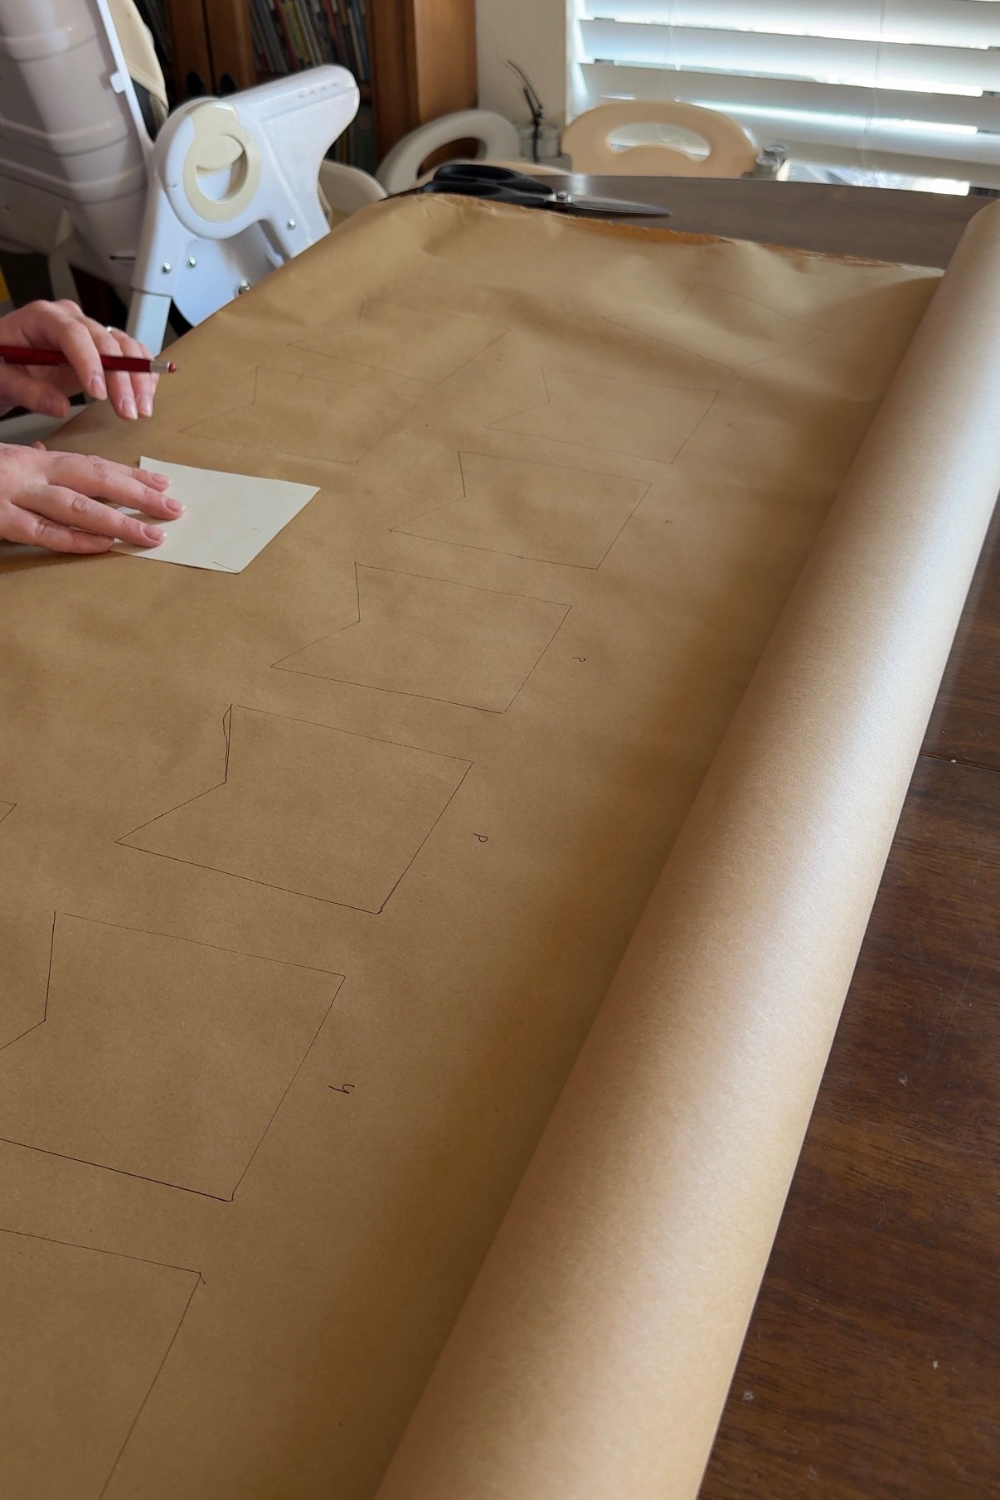

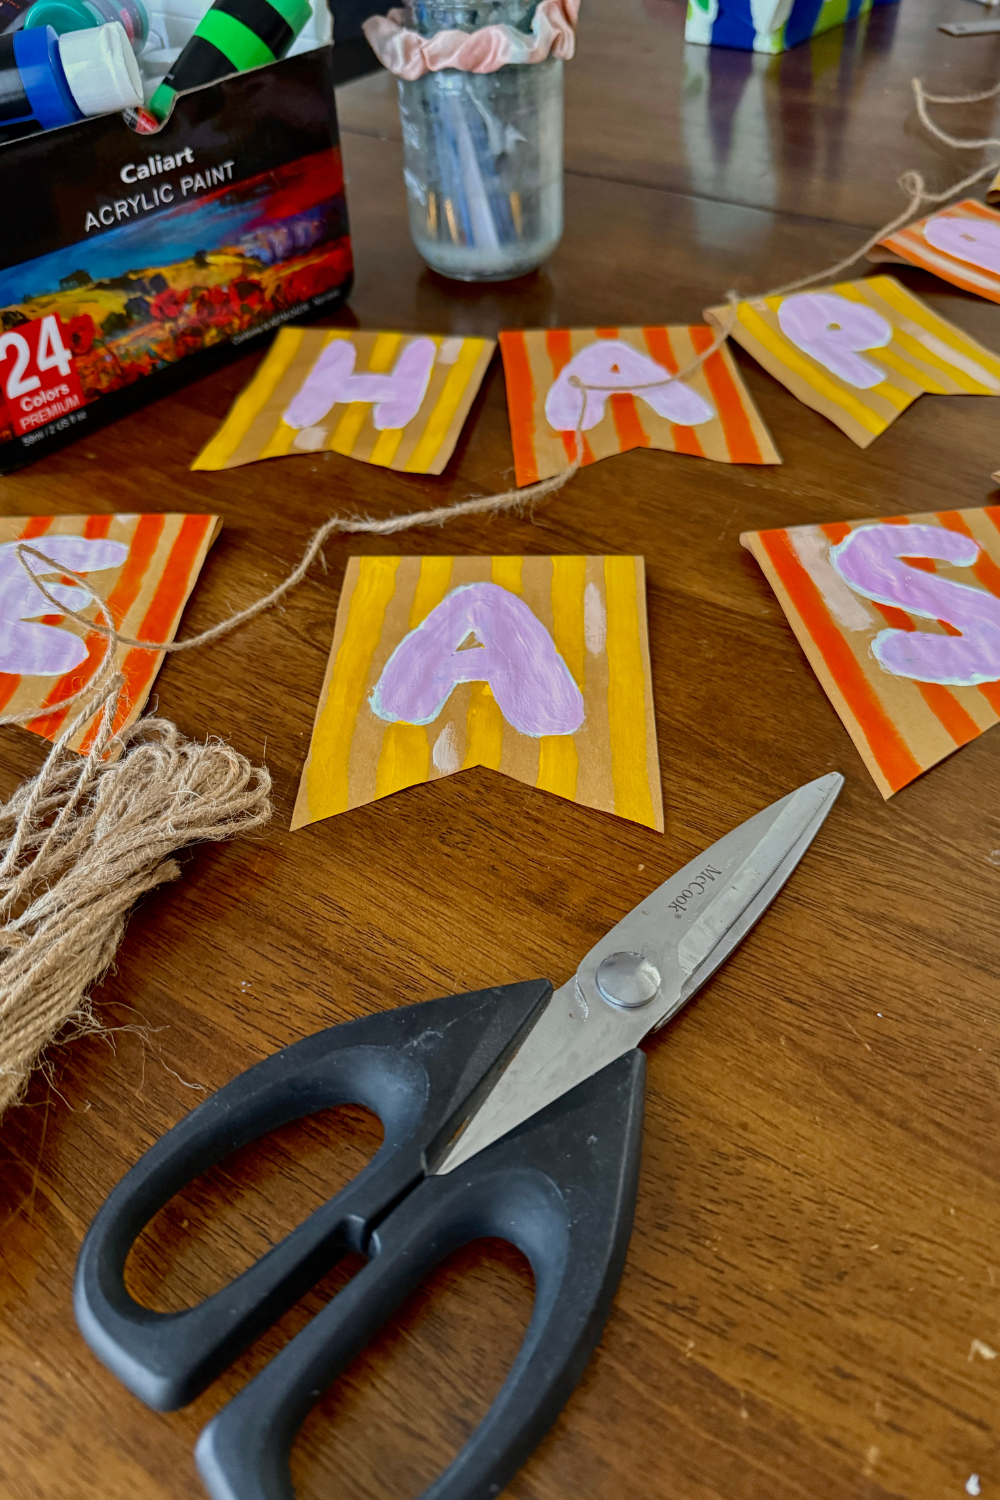
Step 1: Create a template banner piece
Use a thick paper, cereal box or other material to create the banner shape you want for each letter. You will use this on your craft paper to draw out each banner for each letter or any other decorative banner you may include, ie: bunny, dash, flower, etc.
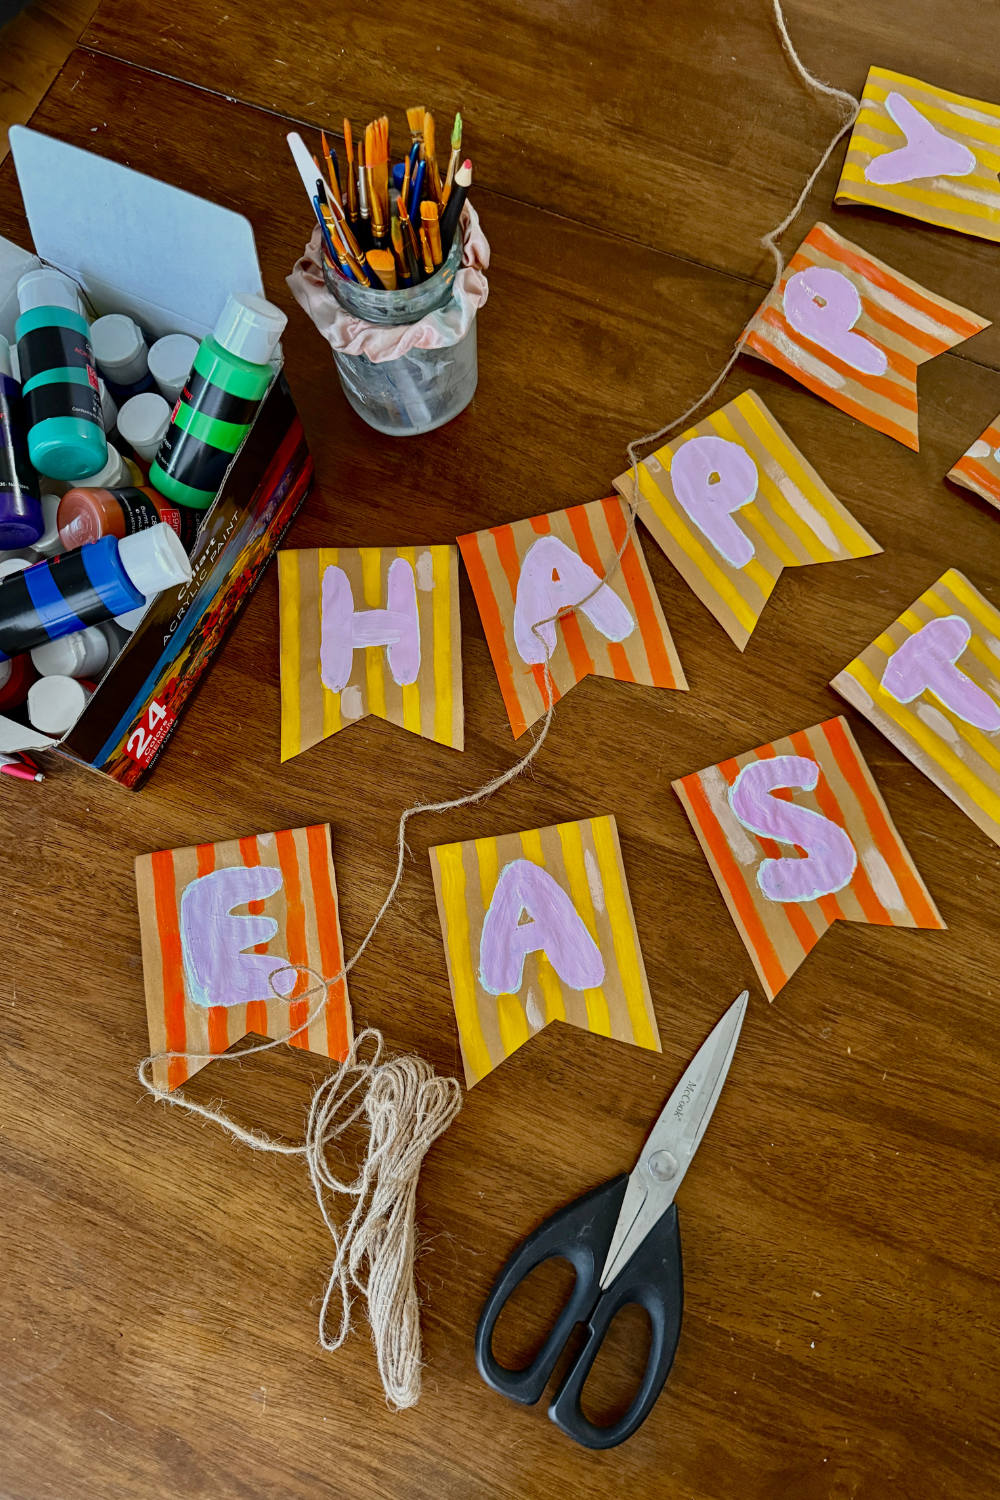
For example, for ‘Happy Easter’, I need 5 banners for ‘happy’ and 6 banners for ‘easter’. If I wanted to add a banner on either end with a design, I would need a banner per design.
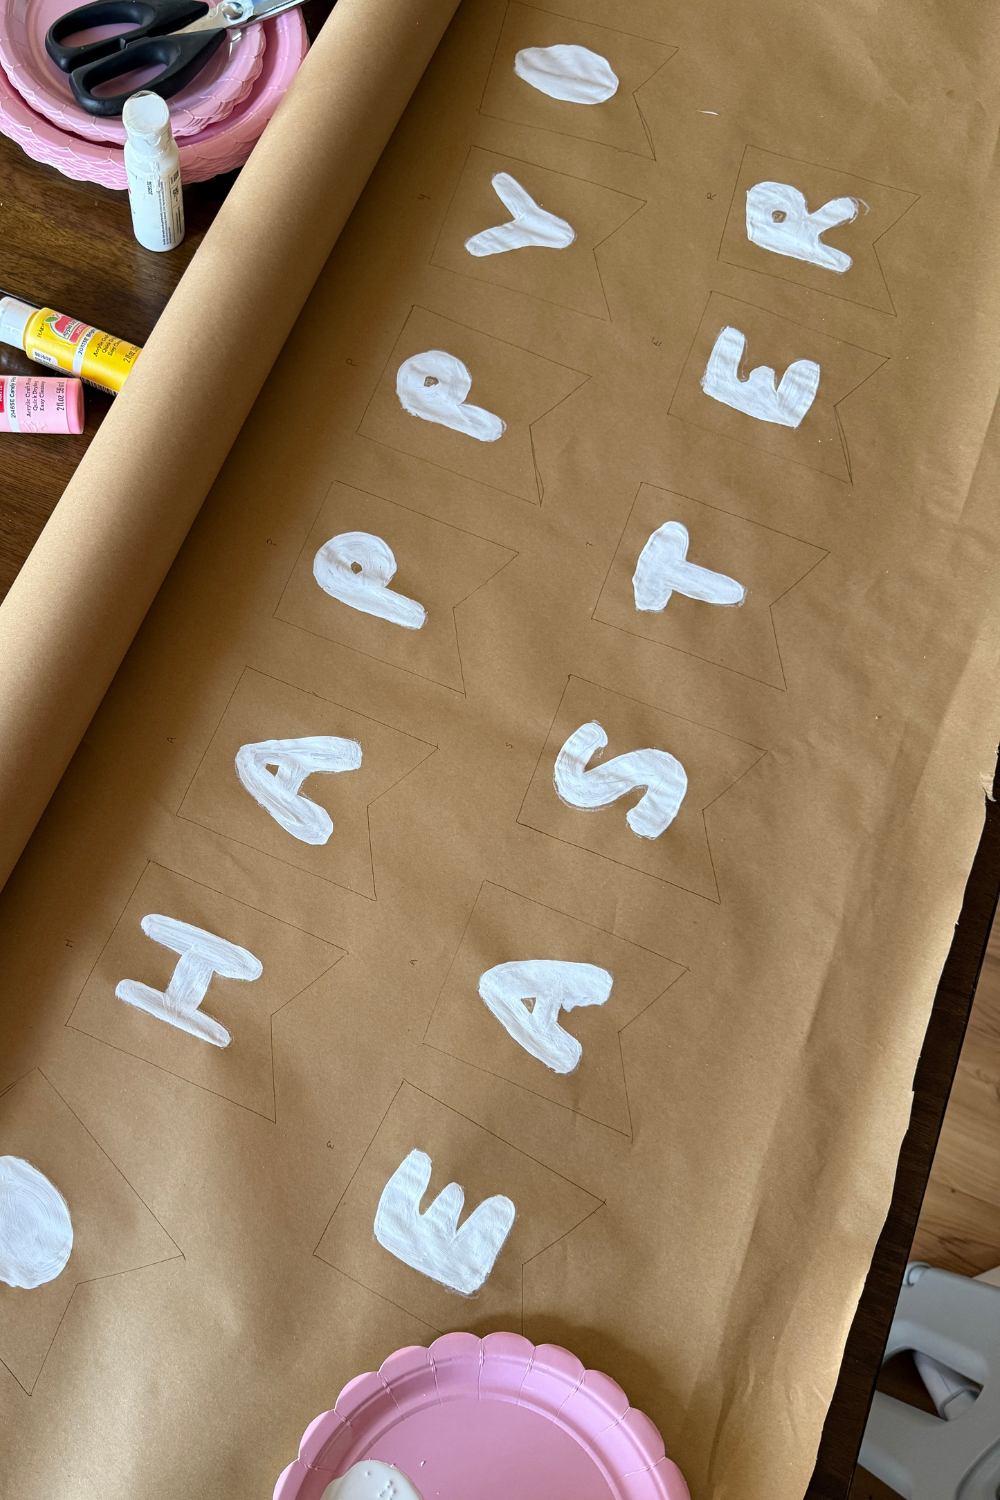
Step 2: Paint your design & letters
Paint your craft paper banners in whatever colors you want your banner to be. Soft pastels for Easter, brighter tones for birthdays, or something more neutral depending on where it will hang. Let it dry before moving on.
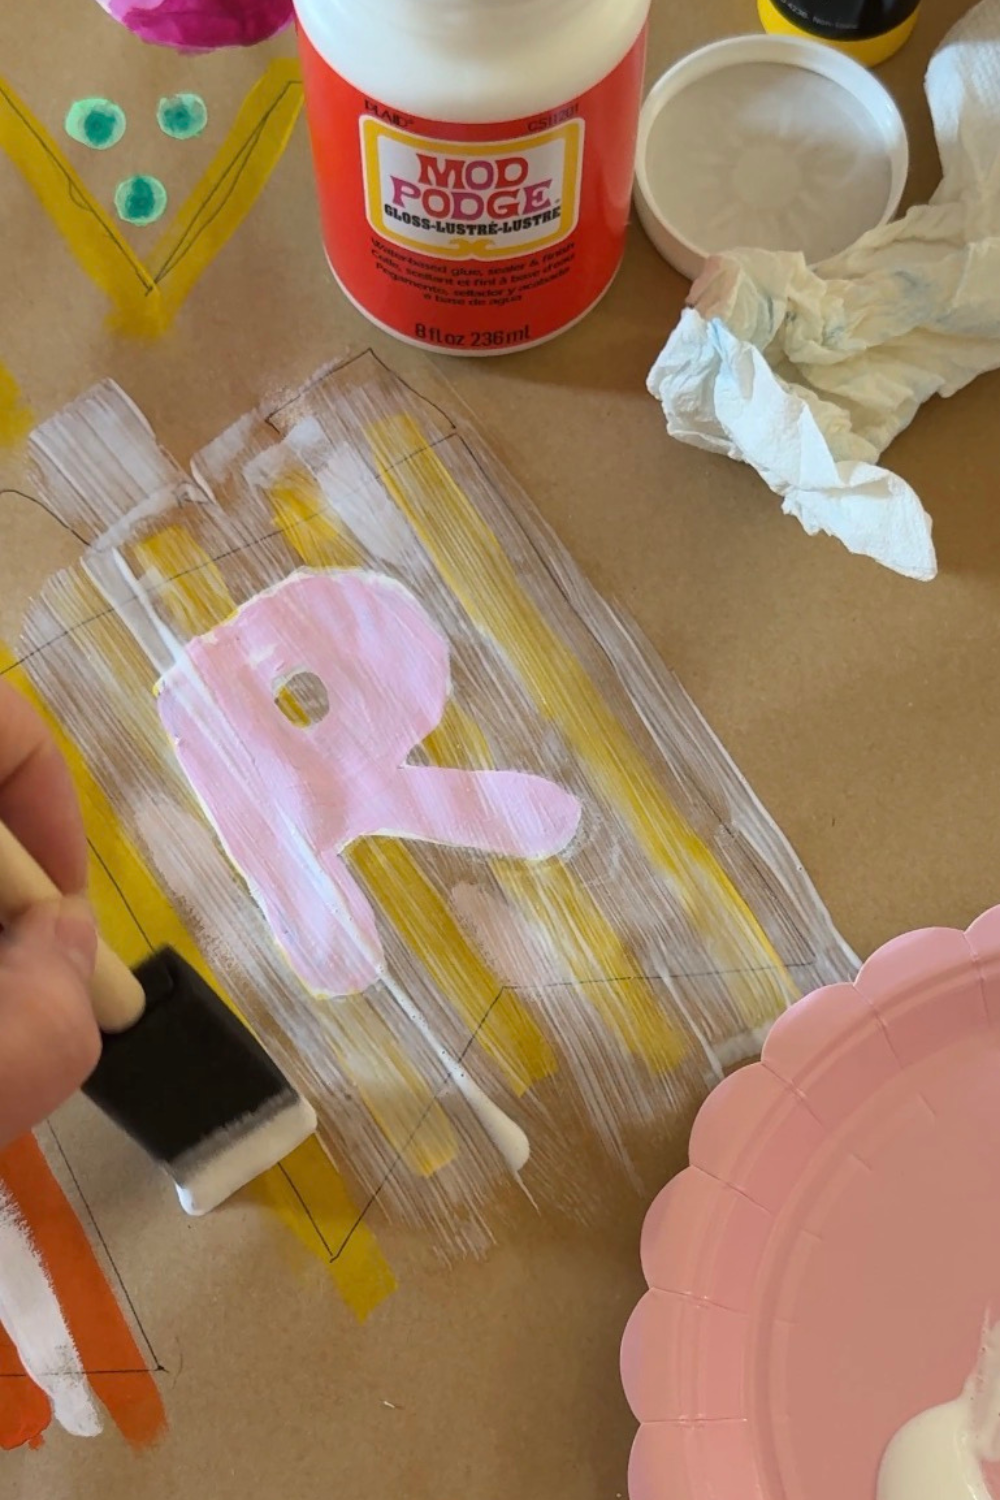
Step 3: Seal with Mod Podge
Once the paint is dry, add a layer of Mod Podge over the paper. This is what gives the paper a slight stiffness so it holds its shape and feels more finished instead of flimsy. Let that dry completely.
Step 4: Cut your banner pieces
Cut your banner pieces into your desired shape. Rectangles, flags, or something more decorative all work. Then add your letters, either painted or cut from another piece of paper. It does not need to be perfect to look good.
Step 5: Roll the tops
At the top of each piece, gently roll the edge over to create a small loop. The Mod Podge helps the paper keep this shape so you do not need anything extra to hold it.
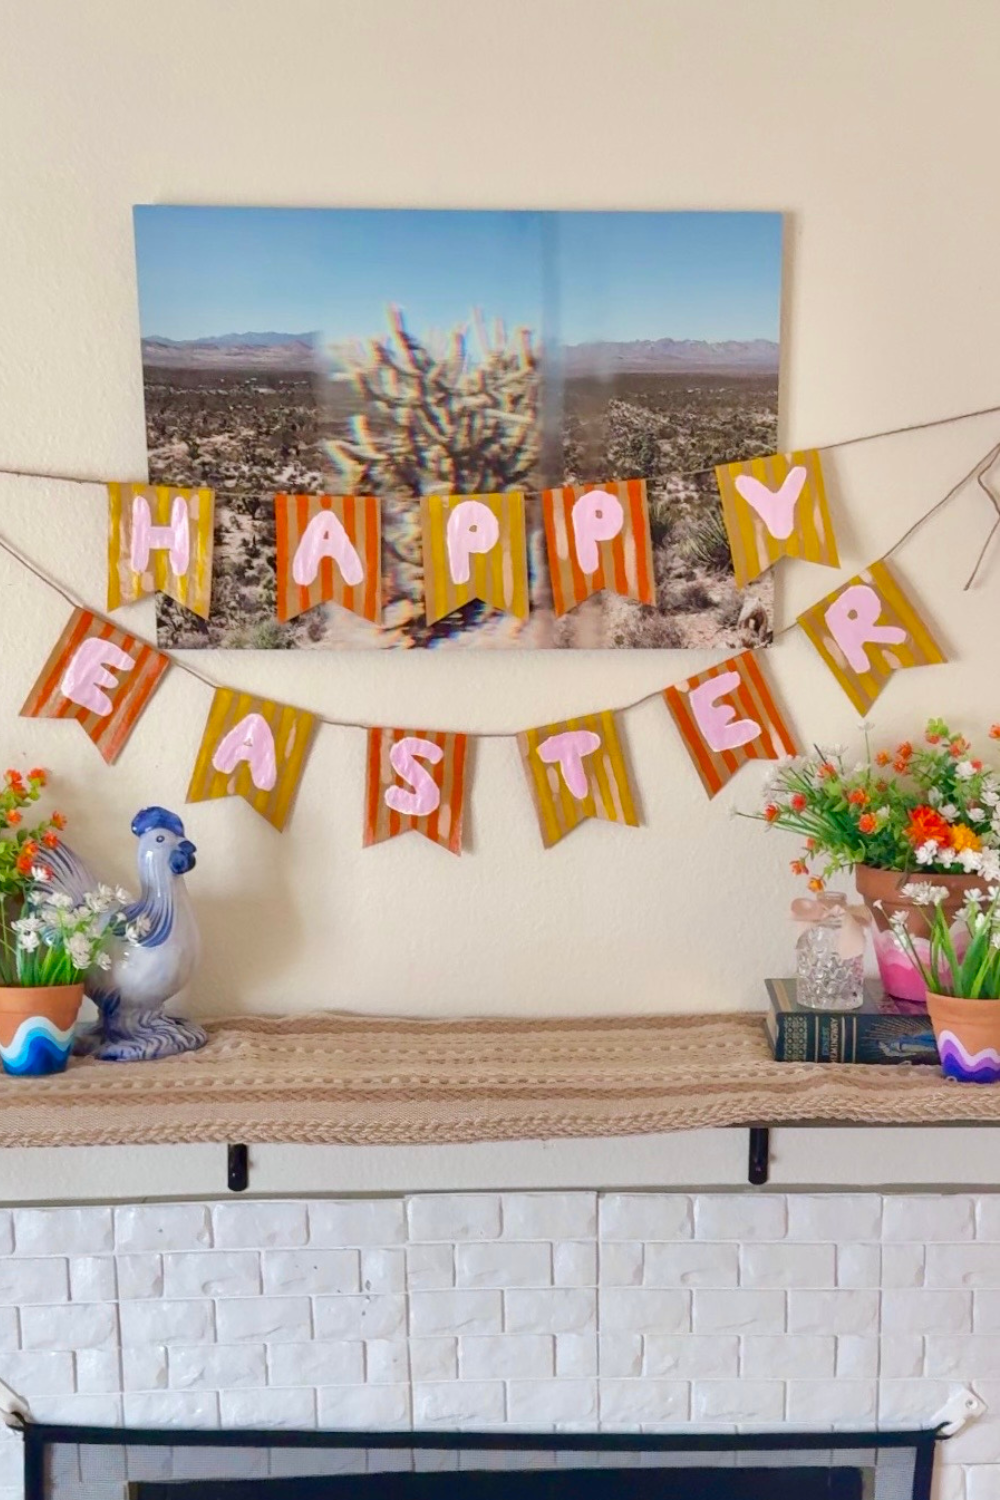
Step 6: String it together
Thread your yarn, string, or hemp cord through each piece. Adjust spacing depending on how you want it to hang, then it is ready to go up.
It comes together quickly, uses simple materials, and still looks intentional. Instead of waiting on shipping and hoping it matches what you pictured, you get exactly what you want the same day.
Ways to use this beyond Easter
Change the colors, words, or shapes and reuse the idea for birthdays, holidays, baby showers, or party backdrops. Once you make one, it is easy to keep going.
If you have ever seen a decoration online and thought you could make it yourself, this is one of those projects where you should. It is easy, it is cute, and it satisfies that homemade itch for whimsical decor more than anything you could have ordered.