7 Creative Projects for Your Next Craft Night

The best girls’ night crafts give everyone enough creative freedom to make something personal, with a picture-perfect addition to their collection of knickknacks and decor.
These seven projects are approachable and leave everyone with something useful, giftable or worth displaying.
Quick Guide to Choosing Your Craft
Best for a quiet craft night: Bedazzled compact mirrors
Most practical finished project: Fruit-printed tote bags or tea towels
Best relaxed craft: Painted terracotta pots
Best for book lovers: Upcycled book flower arrangements
Easiest project to make in multiples: Mini photo-frame magnets
Best if the host likes preparing ahead: Handmade clay candleholders
Best for a charming detail: A charm-chain bookmark added to a book or journal
1. Bedazzled Compact Mirrors
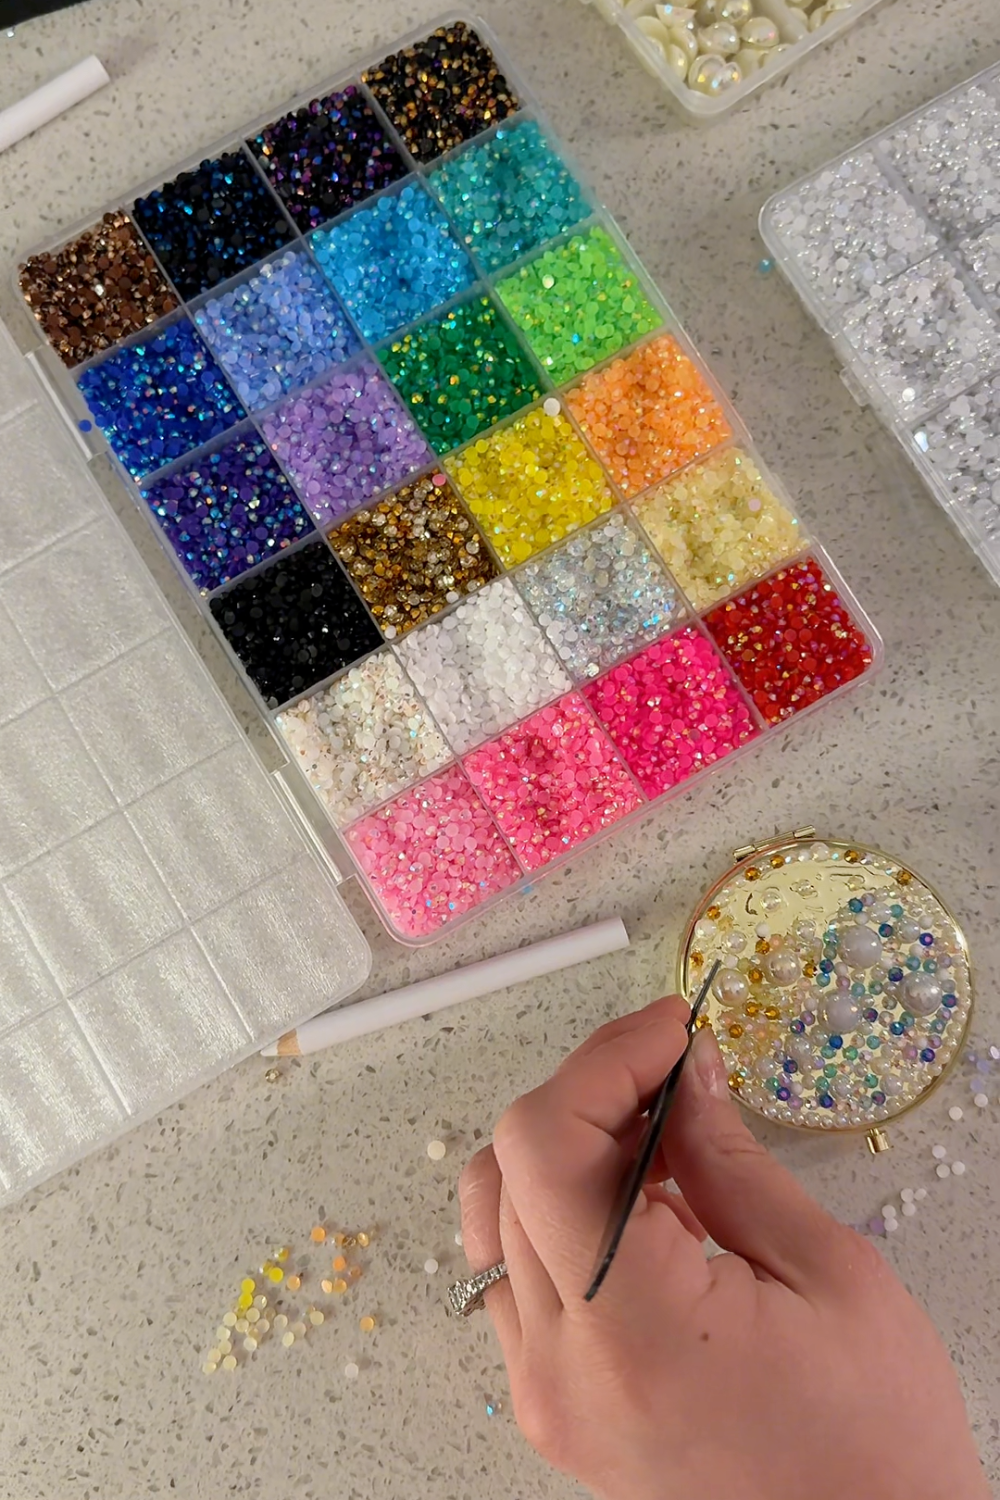
Bedazzling compact mirrors is one of my favorite girls’ night crafts because the supplies are small, the project is easy to personalize and the finished mirror can go straight into a purse or travel bag.
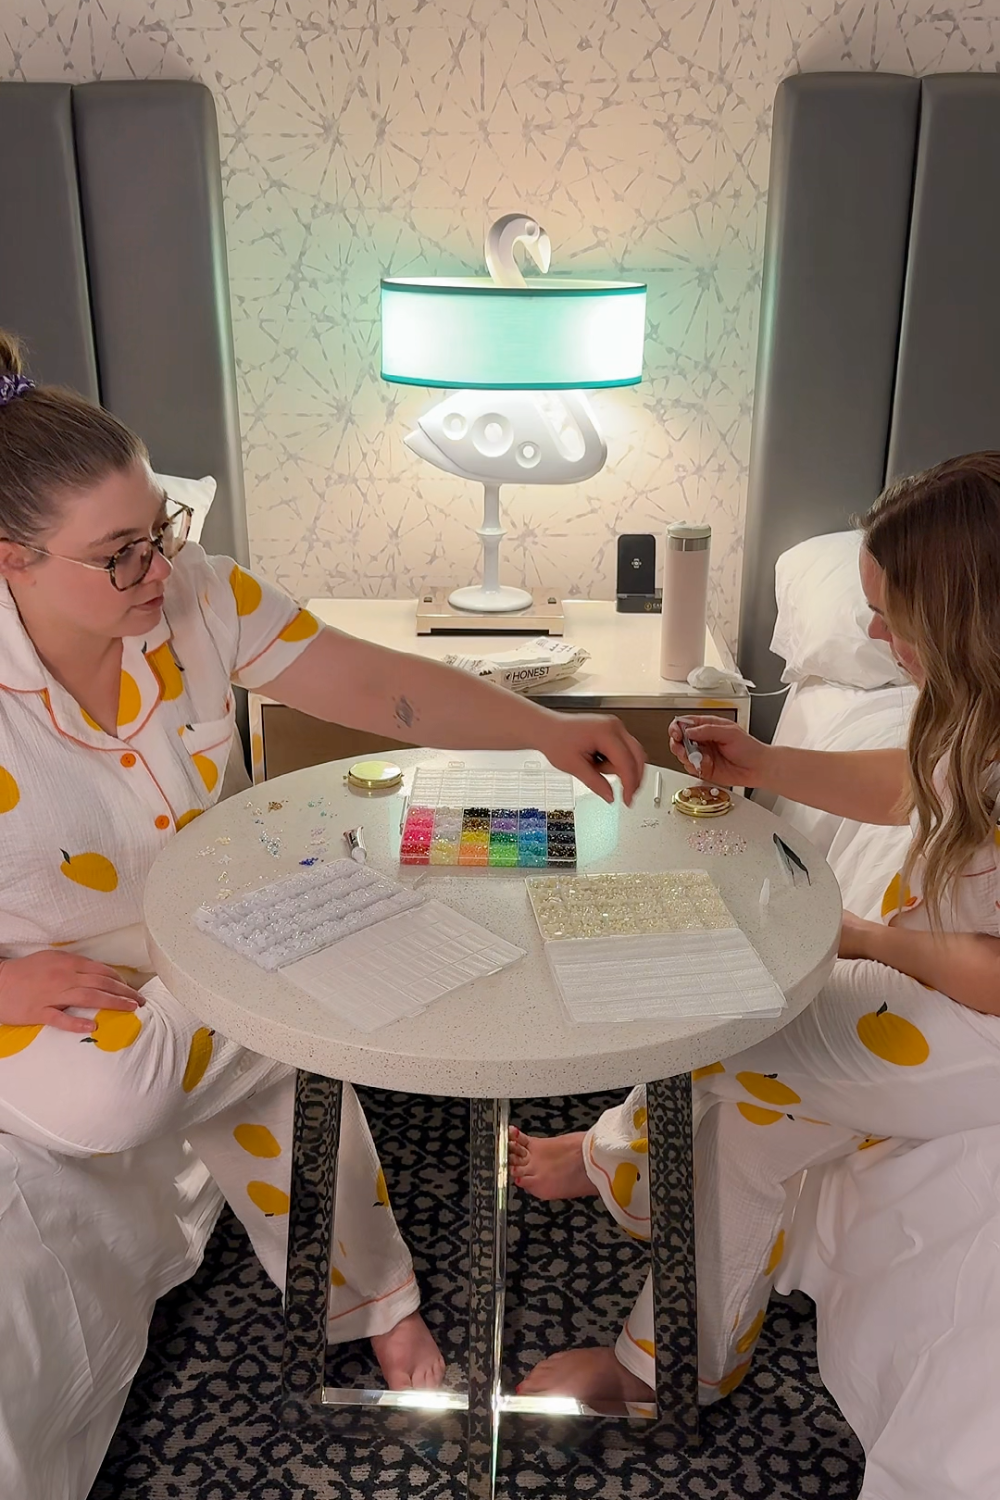
My sister and I made ours during a hotel stay while wearing matching pajamas. We covered gold compact mirrors with a mix of colorful rhinestones, white pearls and warmer ivory pearls. The combination of gem sizes made it easy to fill the surface without every mirror looking the same.
This project also leaves plenty of room for conversation. Everyone can work at their own pace without needing to follow an exact pattern.
Best for: Girls’ trips, sister nights and small groups
Host preparation: Place the mirrors, gems, pearls and adhesive at each seat
Mess level: Low, although the table should still be protected from adhesive
Craft time: Flexible depending on the amount of detail
Guests take home: A personalized compact mirror
This is also a good choice for a group with different skill levels. Someone can create a simple pearl border while another person covers every inch in rhinestones.
Watch & Shop | How I made the bedazzled compact mirrors and shop the supplies.

2. Fruit-Printed Tote Bags and Tea Towels
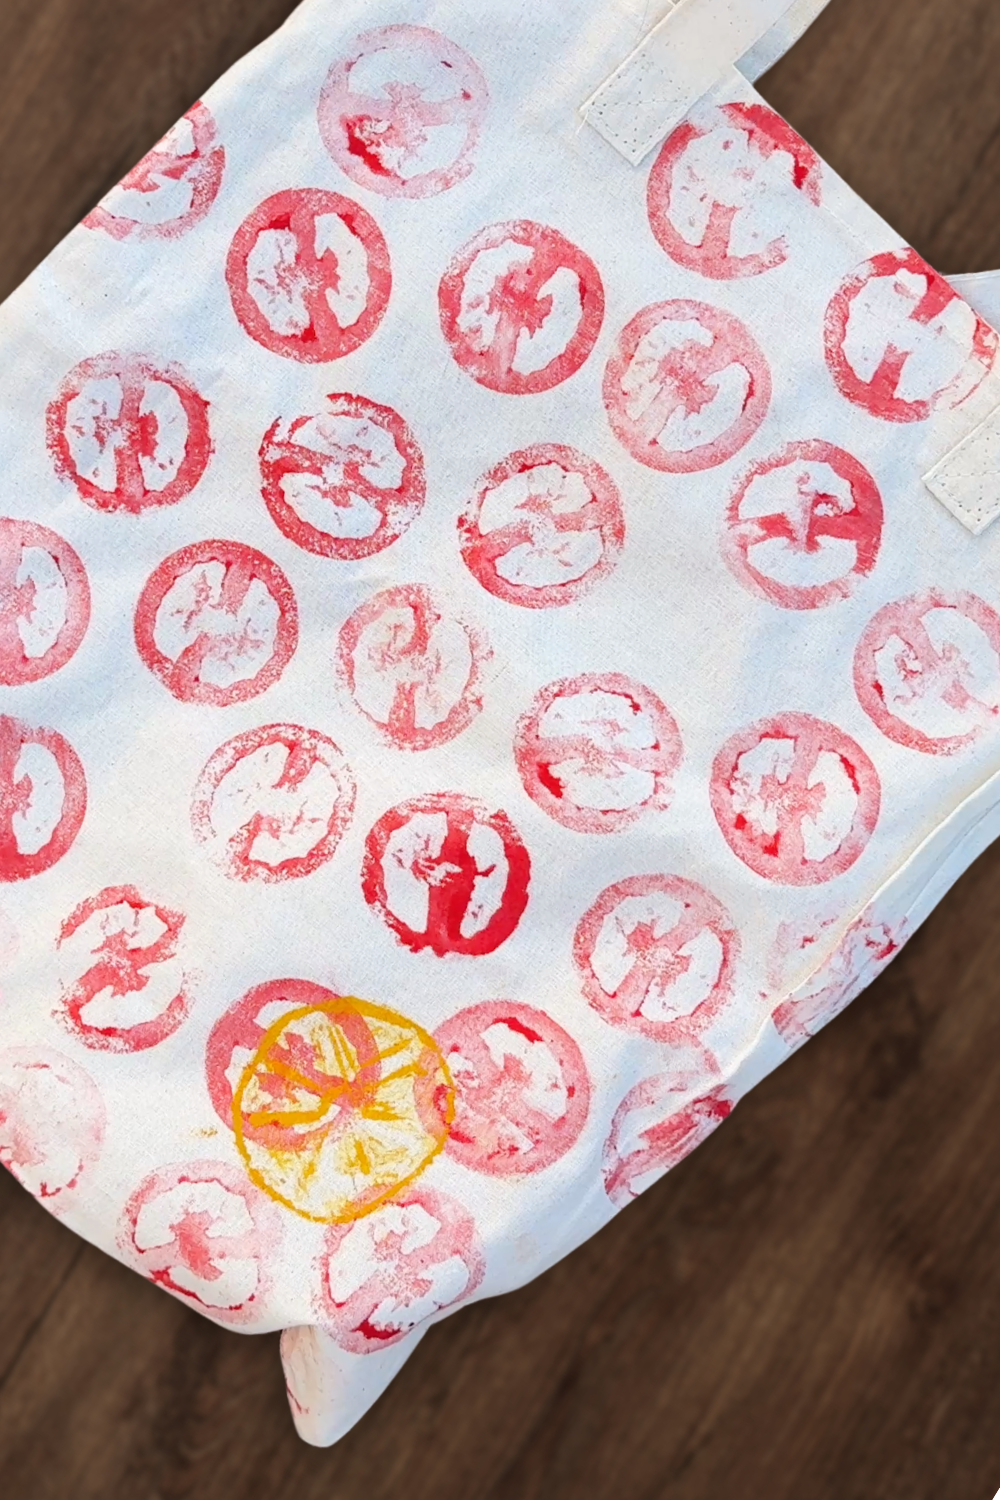
Fruit printing turns fresh fruits and vegetables into natural stamps. Dip the cut surface into fabric paint, press it onto a blank tote bag or tea towel and gradually build a pattern.
The process is simple, but the results can look completely different depending on the colors, spacing and produce each person chooses. Guests can create neat repeating patterns, scattered prints or more playful overlapping designs.
Canvas tote bags are particularly useful because guests can carry them again after the party. Tea towels work well for someone who would rather make something for the kitchen.
Best for: Summer gatherings and farmers-market themes
Host preparation: Cut the produce, cover the table and place cardboard inside each tote bag or beneath each person’s painting station
Mess level: Medium
Estimated craft time: 60–90 minutes for two or three small items
Guests take home: A printed tote bag, tea towel or both
Set out more blank items than each guest plans to decorate. Someone who finishes a tote quickly may want to make a matching towel, while another person may want a fresh surface after testing the first few prints.
Watch & Shop | How I made the fruit-printed tote bags and tea towels and shop the supplies.
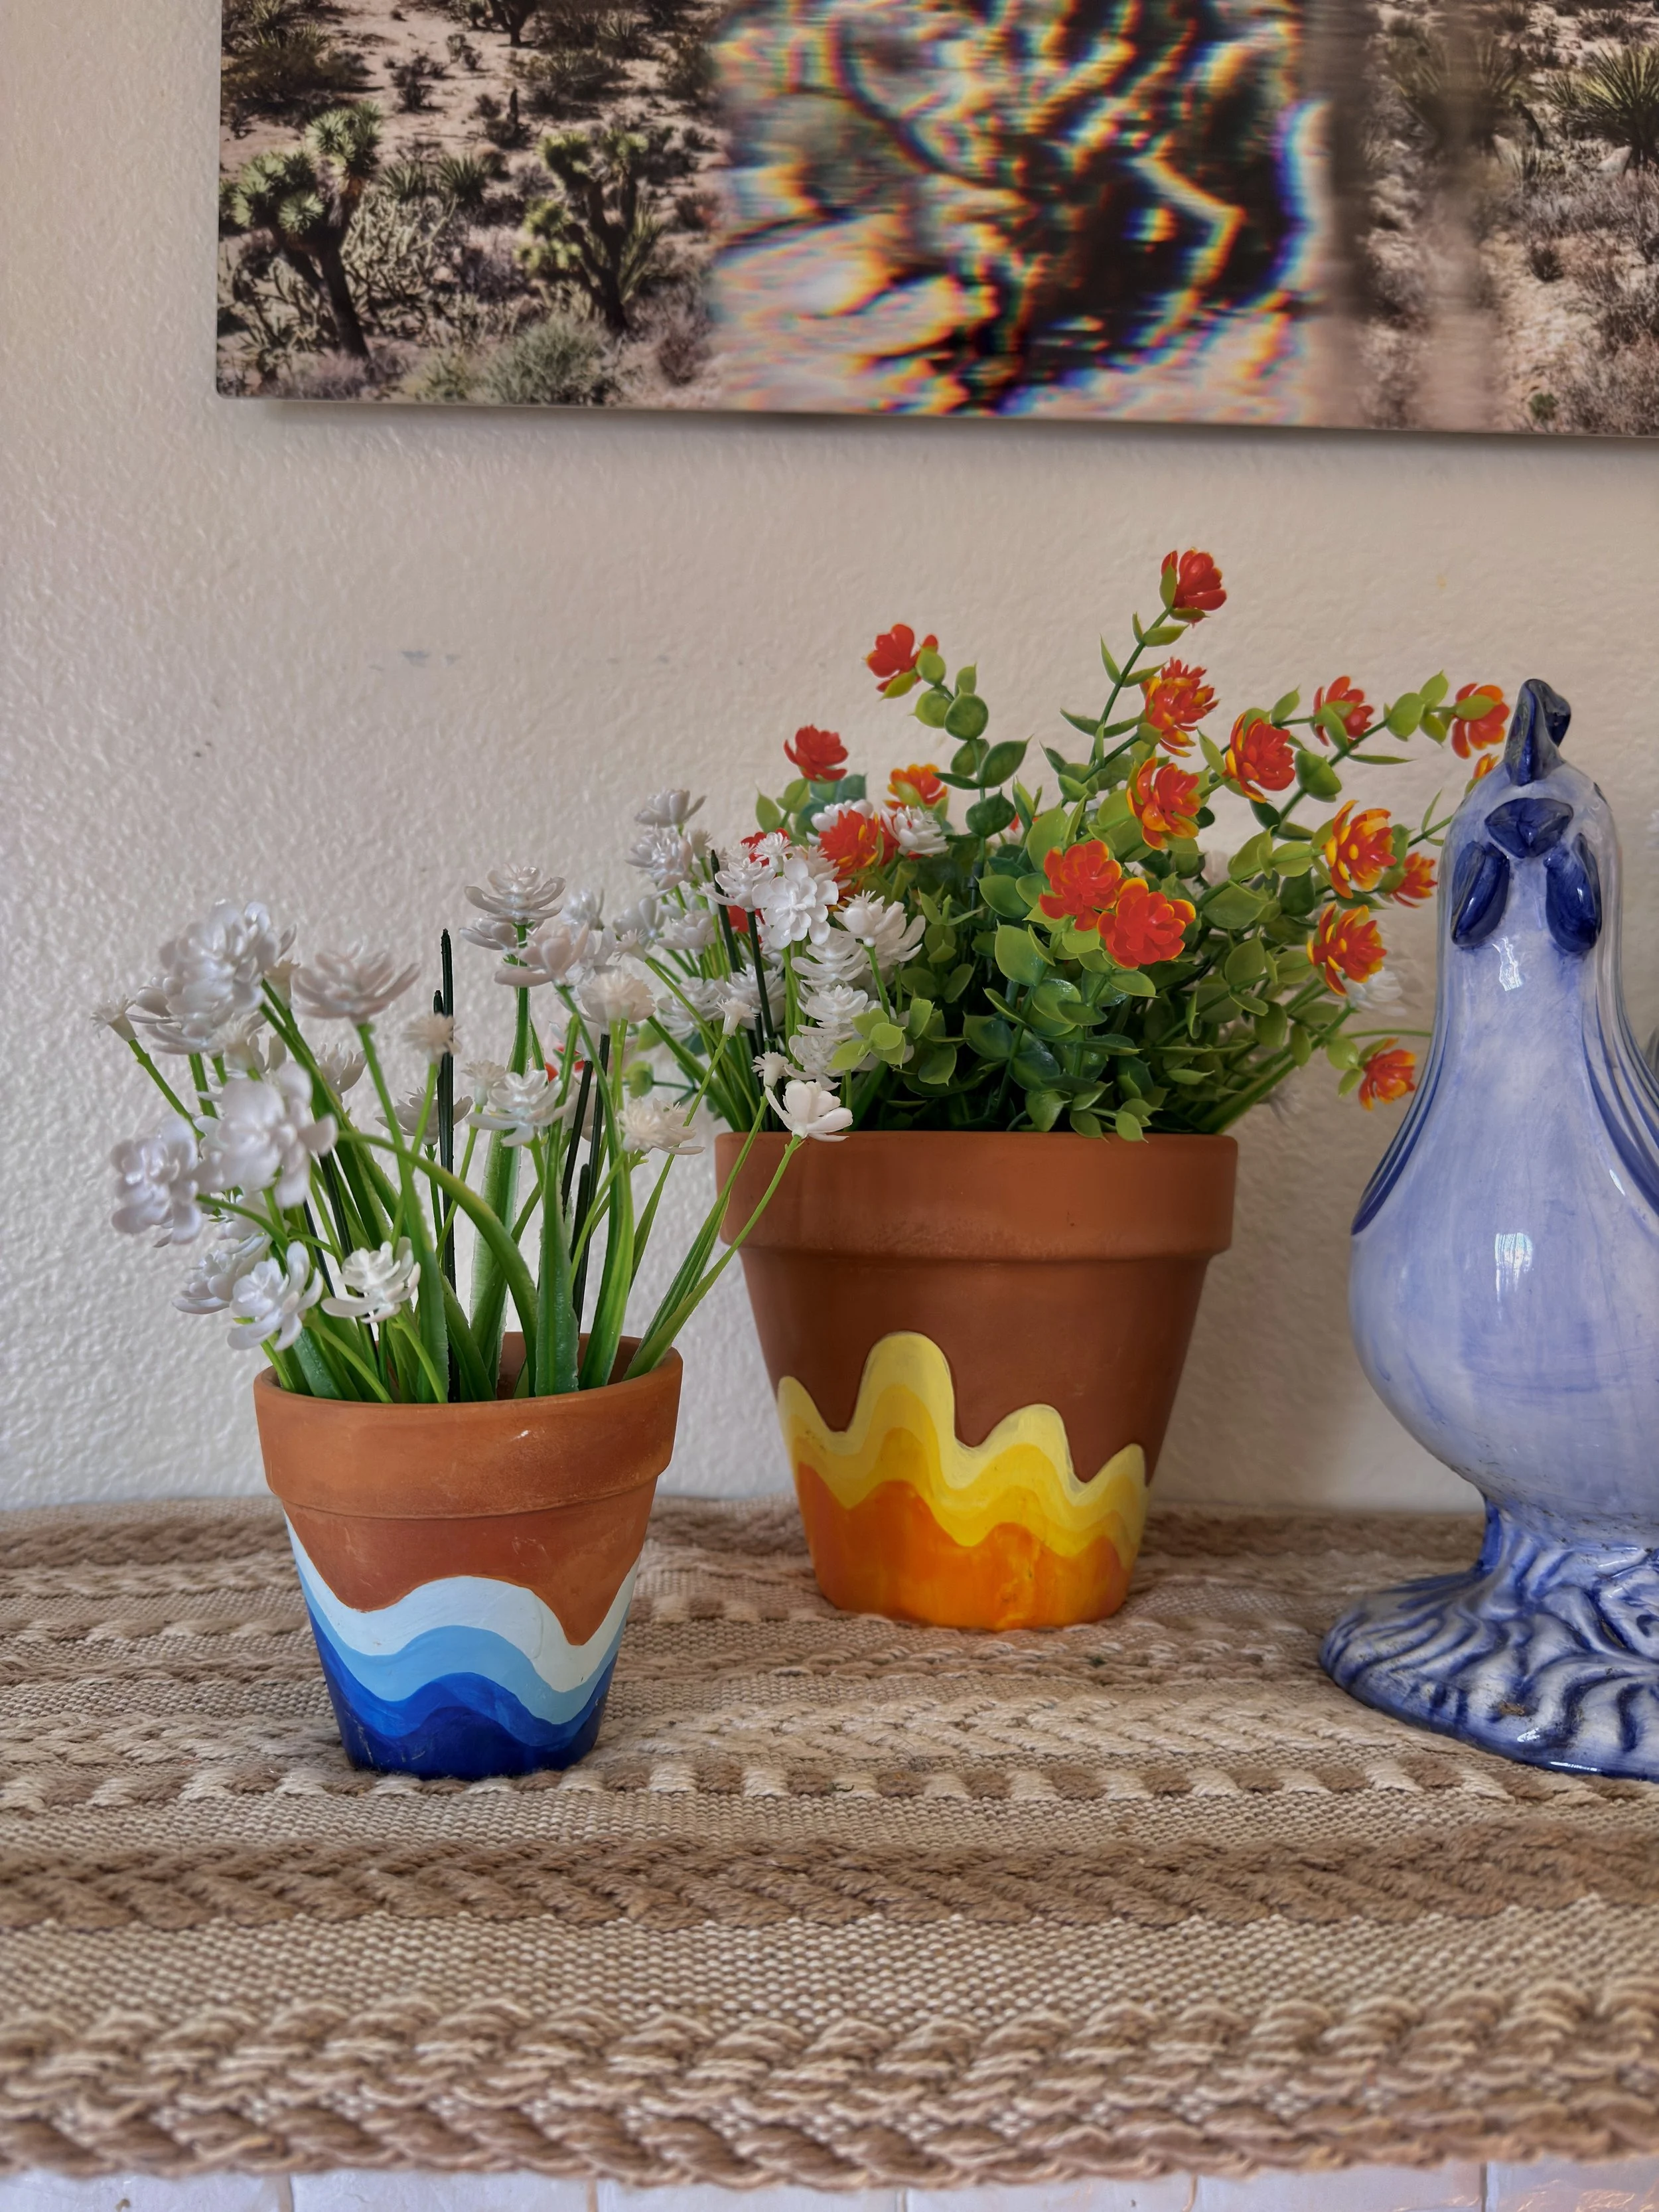
3. Painted Terracotta Pots
Painting terracotta pots is an easy choice when you need a craft that feels creative without requiring a detailed tutorial.
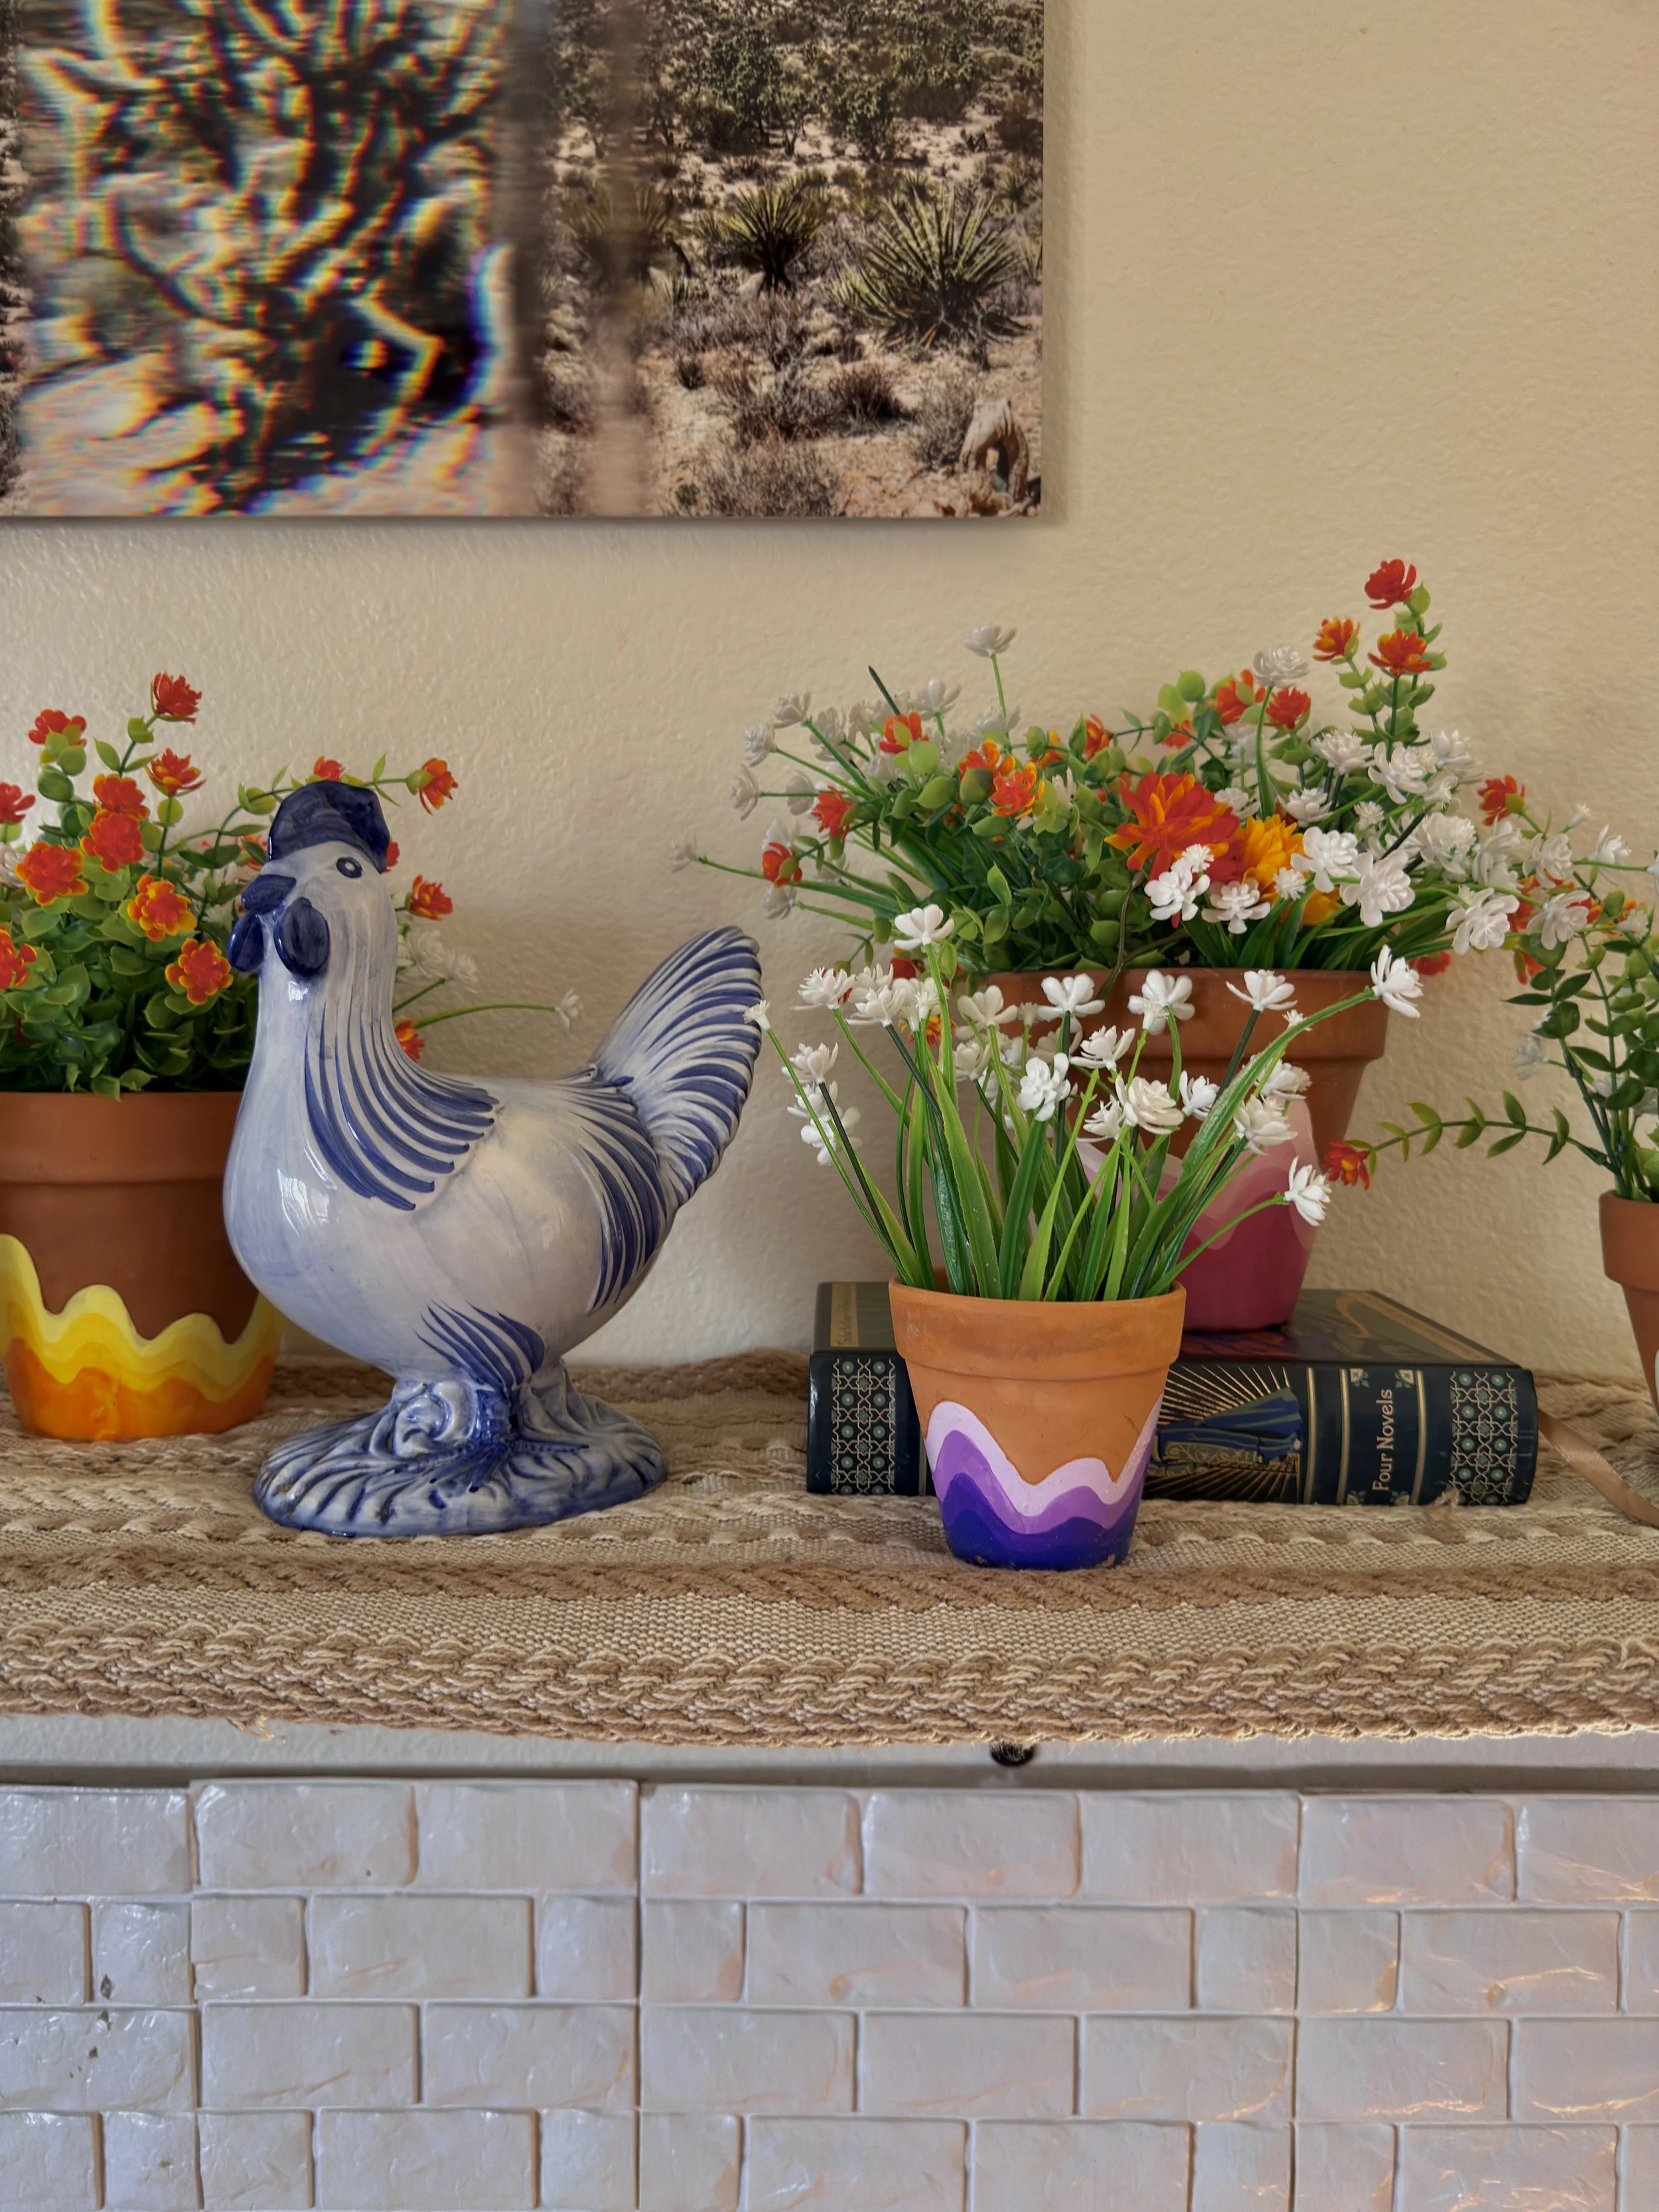
Guests can paint flowers, stripes, checkerboards, abstract shapes or simple blocks of color. No one has to copy the same example, and a basic design can look just as finished as a more detailed one.
Terracotta pots are also relatively easy to find through craft stores, Amazon or Facebook Marketplace. Many people already have acrylic paint and brushes at home, which can keep the supply cost manageable.
Once the paint is dry, I recommend adding a protective layer of Mod Podge. The pots I painted and sealed have remained outside in the Nevada sun for more than a year, and the colors are still vivid.
Best for: Beginners, outdoor gatherings and groups with mixed skill levels
Host preparation: Cover the table and set out paint, Mod Podge, brushes, water and paper towels
Mess level: Low to medium
Estimated craft time: 45–90 minutes for two or three pots
Guests take home: Painted planters ready for herbs, flowers or houseplants
This is one of the better options when the goal is to sit, talk and make something without spending the evening studying instructions.
Watch | How I painted the terracotta pots and shop the supplies.
4. Upcycled Book Flower Arrangements
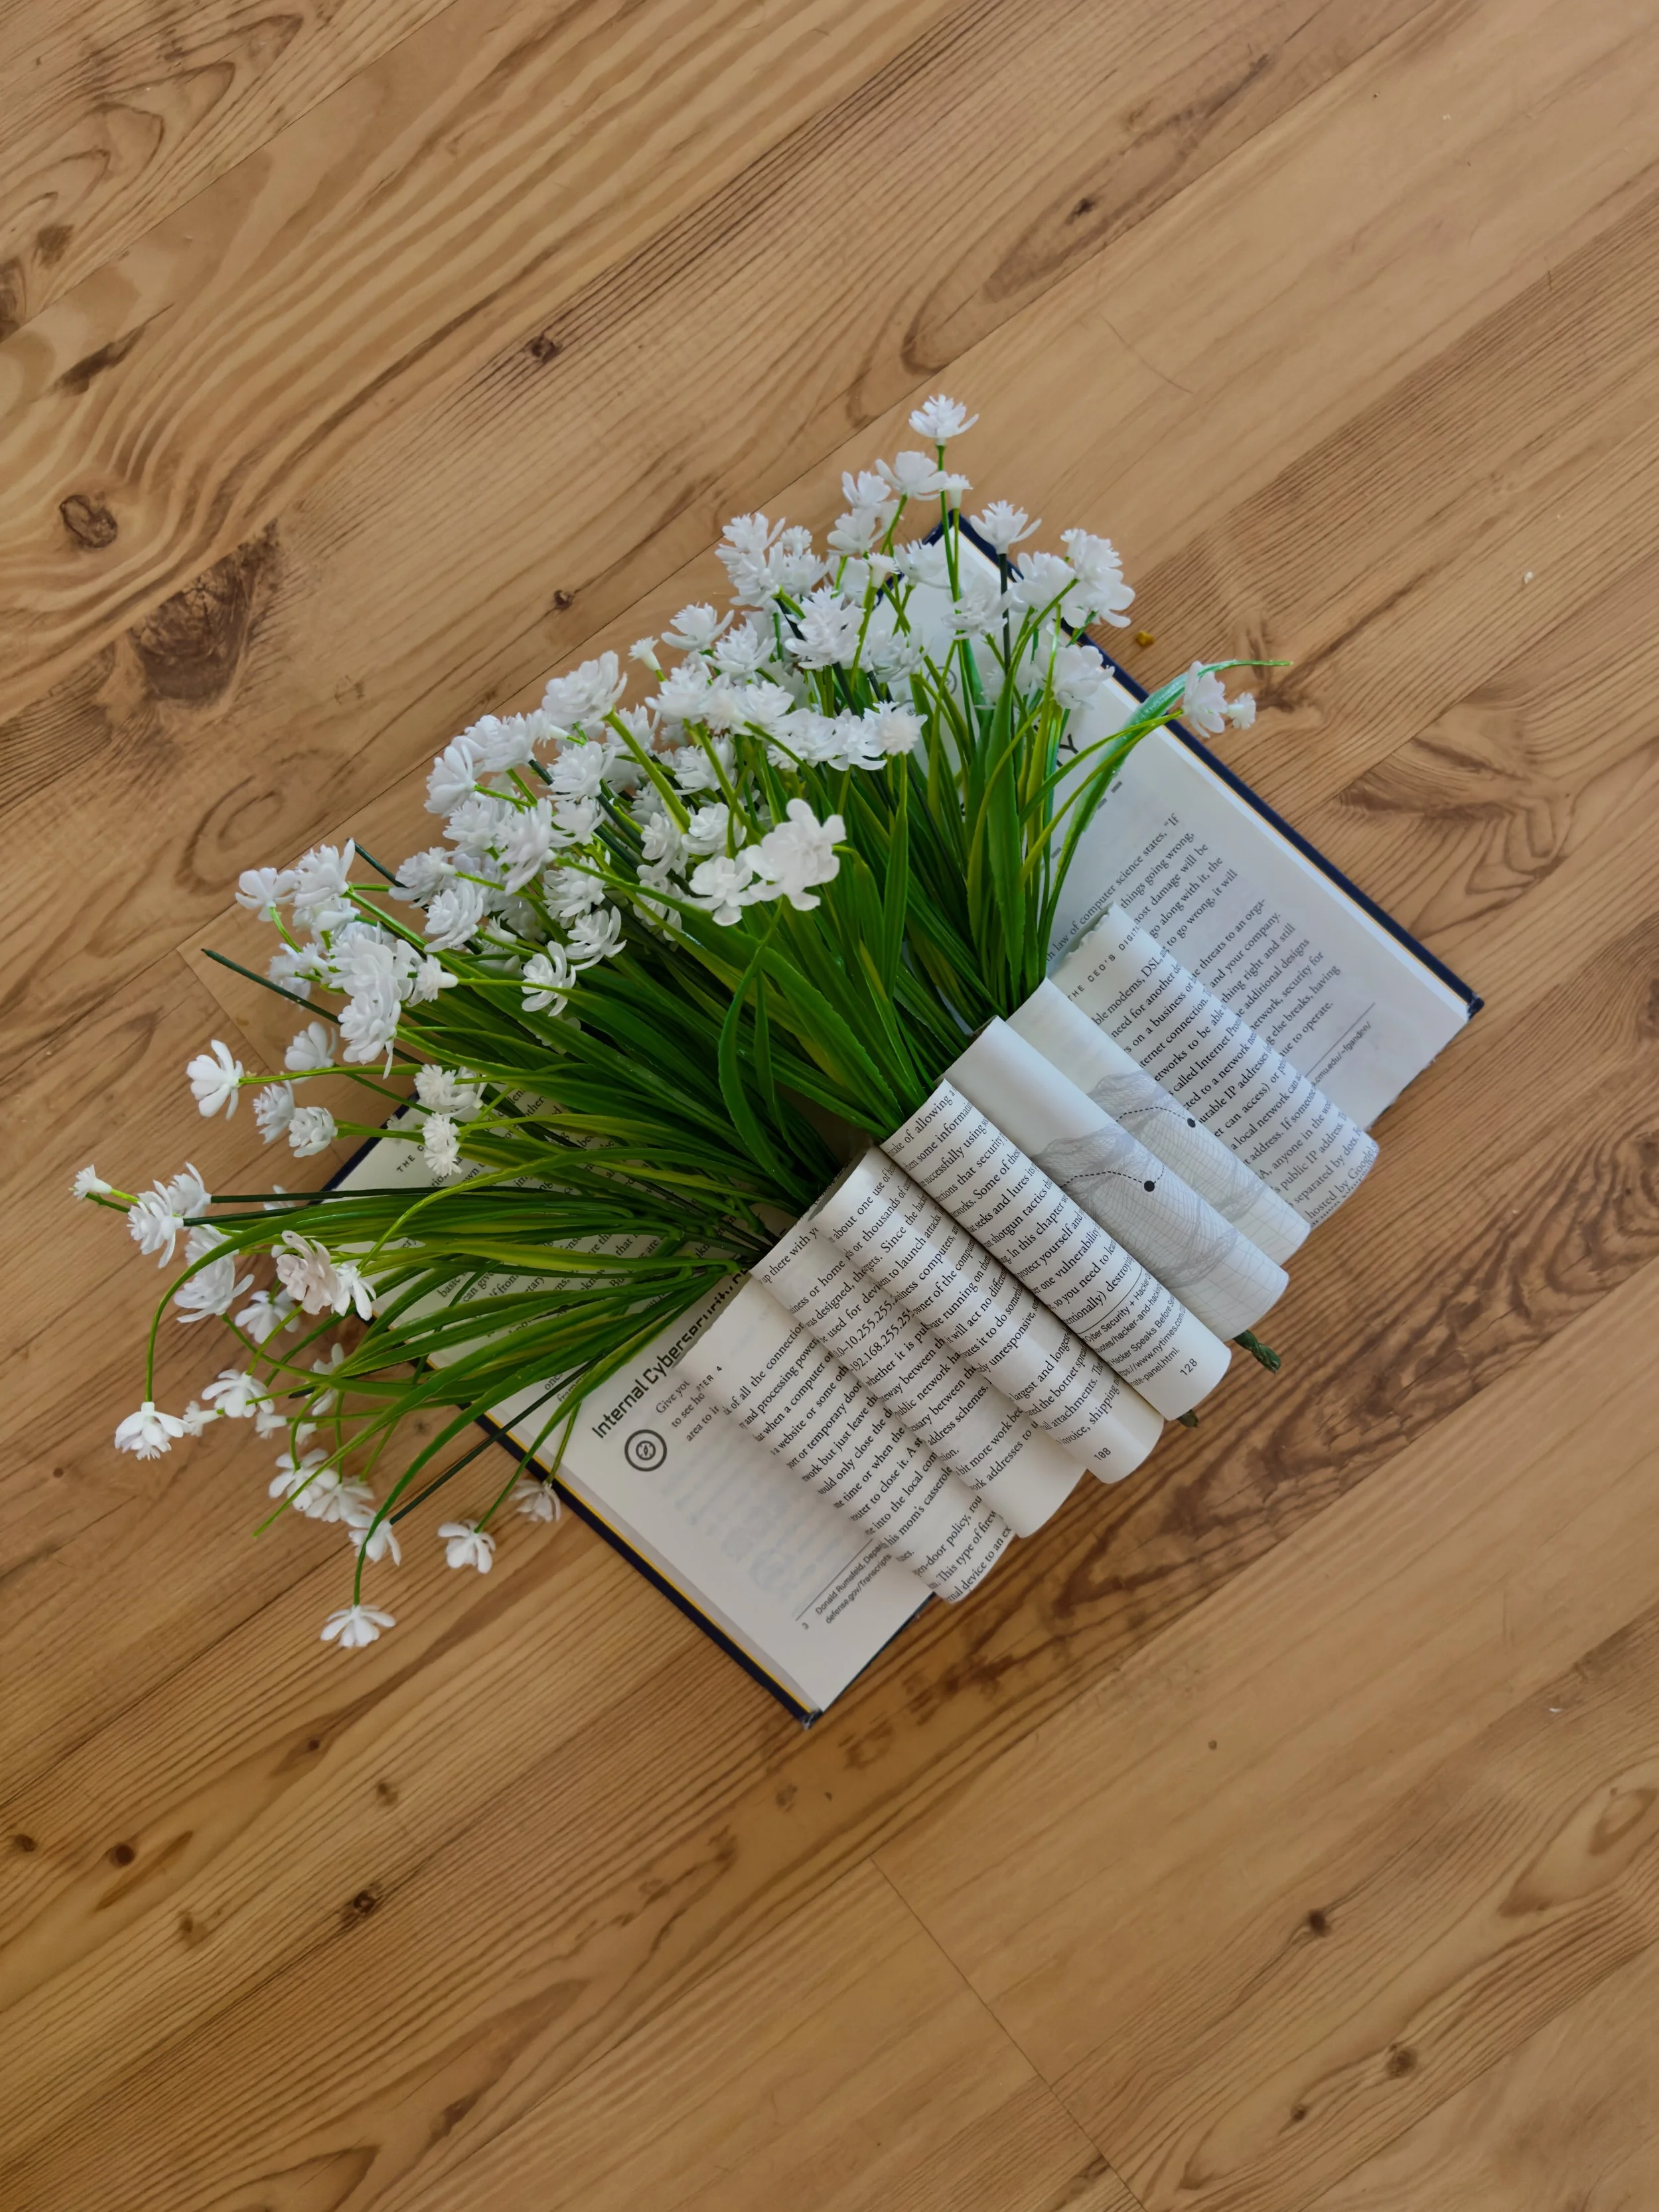
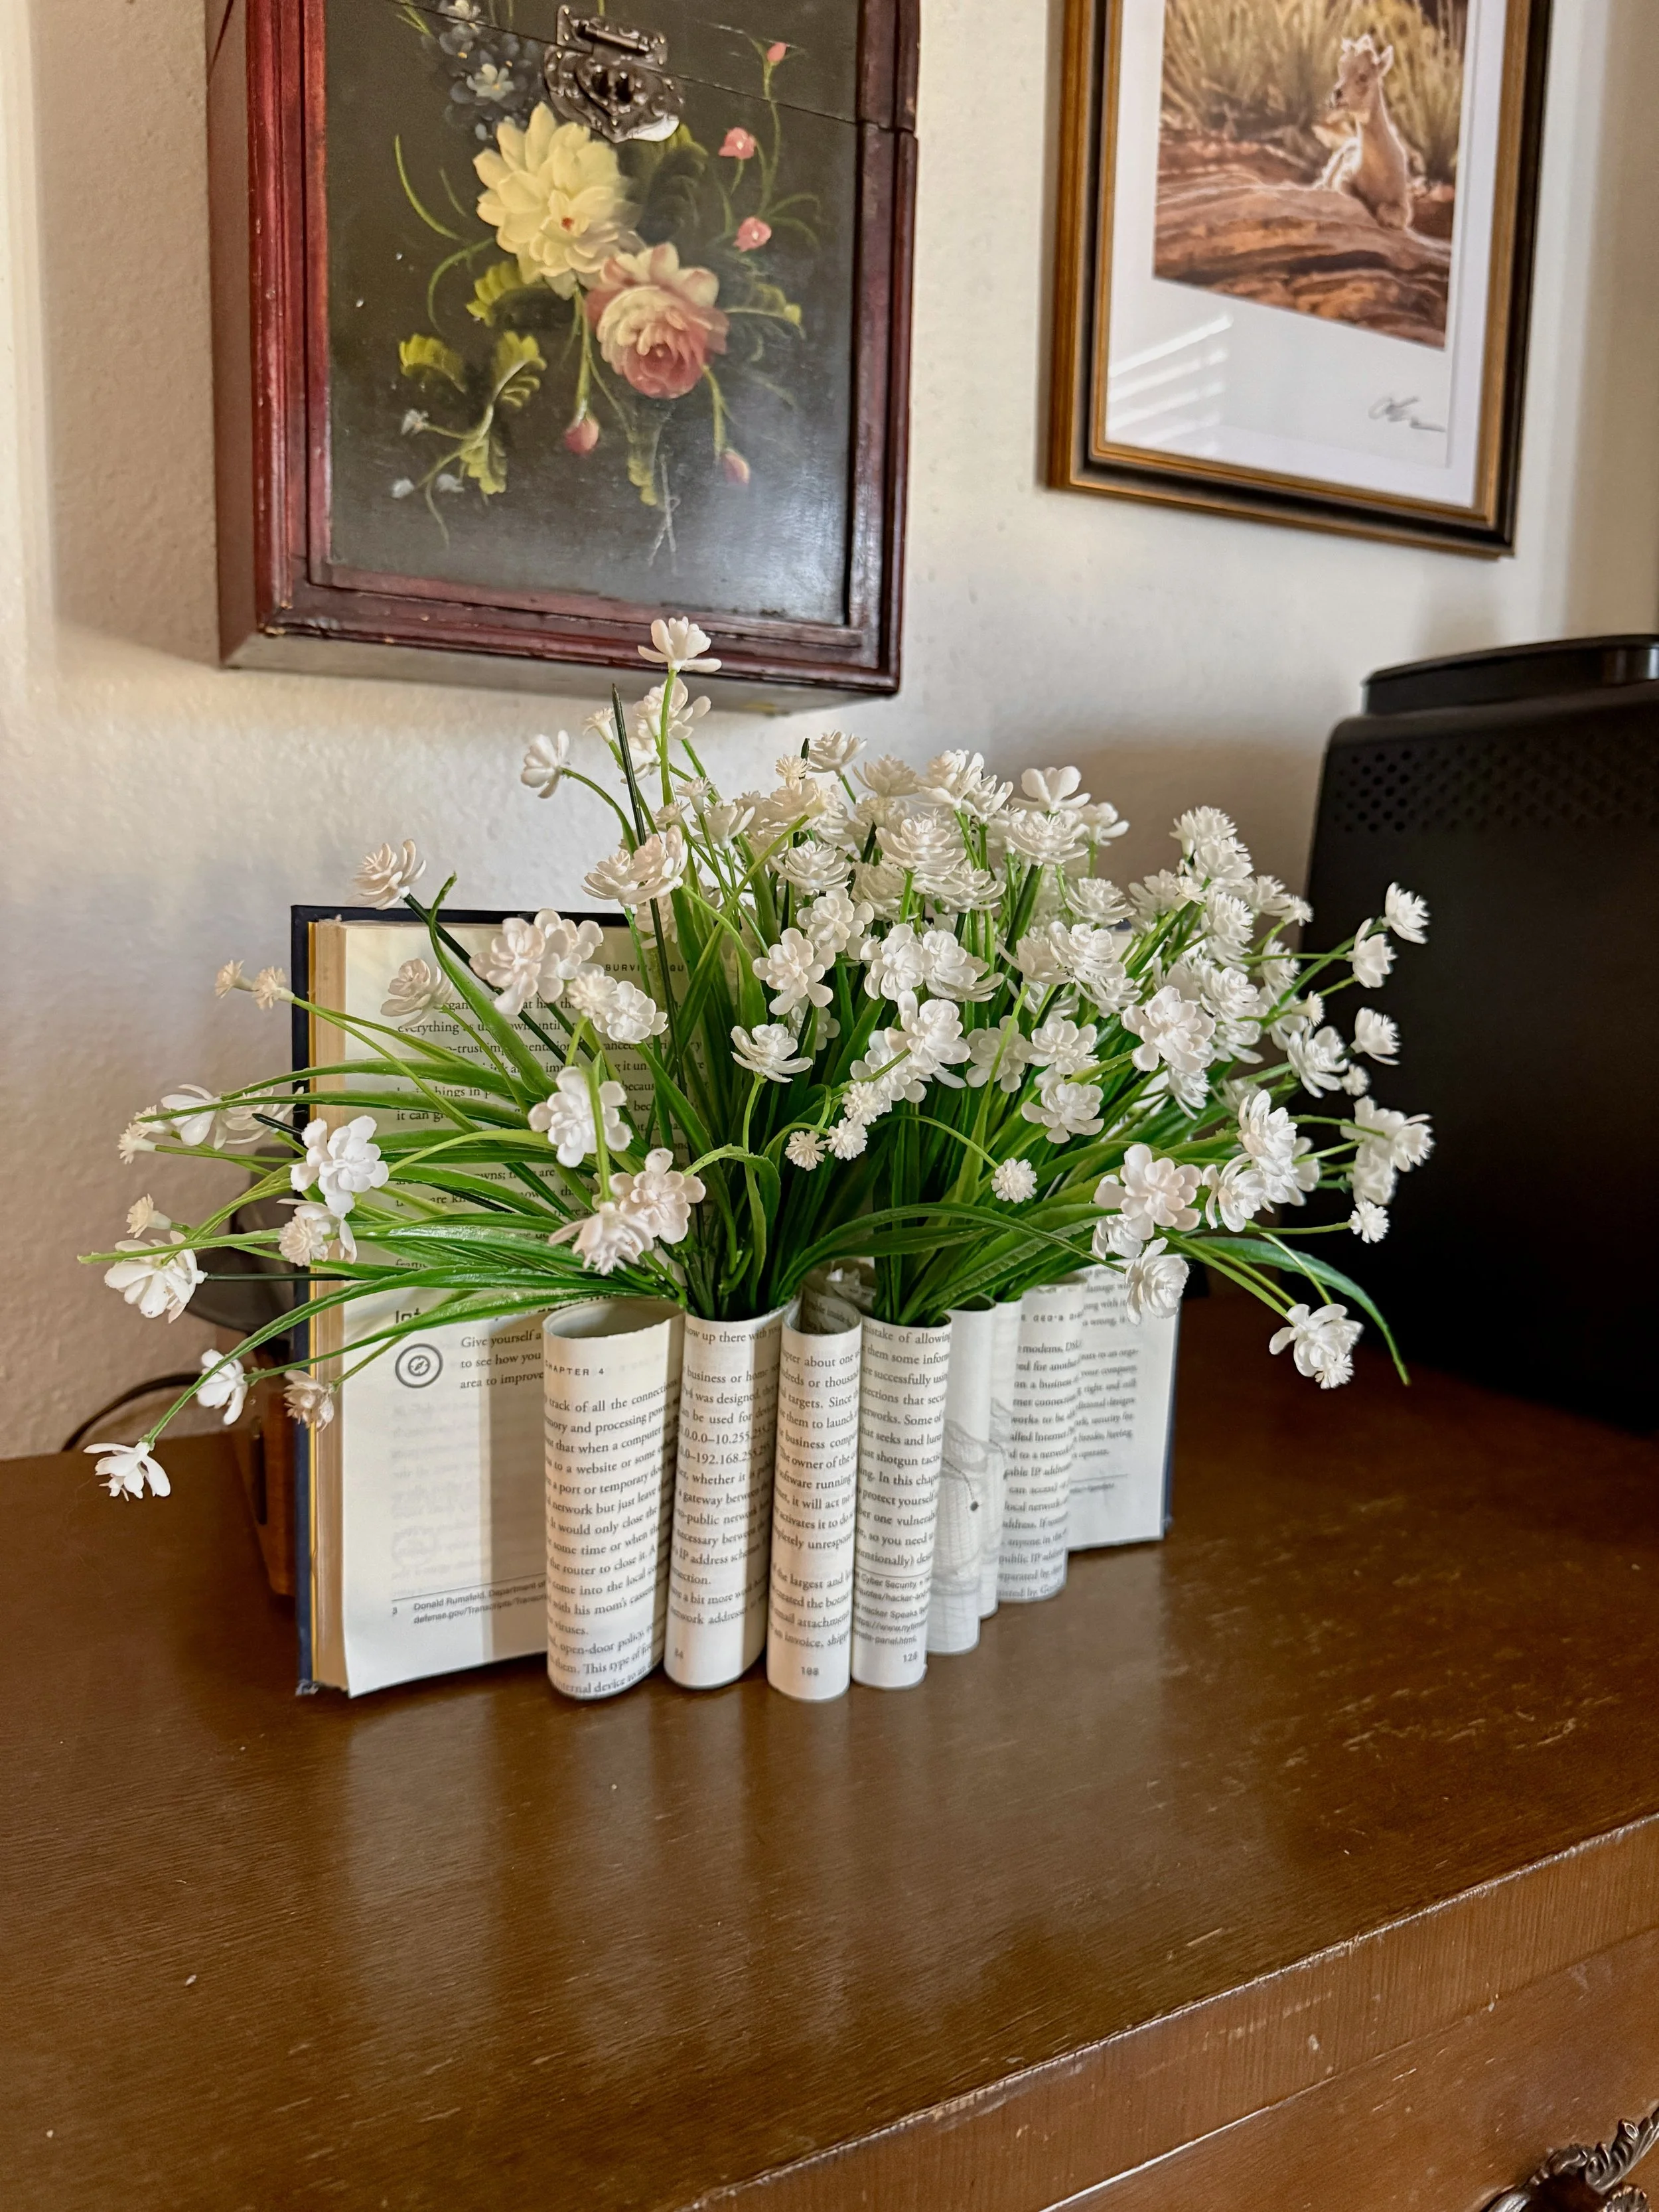
This project turns an unwanted or damaged book into a flower centerpiece that can also be displayed as wall decor.
Sections of the center pages are cut partway down. The cut pages are then folded into loops and secured with hot glue. Those loops create small openings where flowers can be arranged.
The finished book can sit open on a table as a centerpiece. It can also become a vertical decor piece for a bookish wall, reading nook or seasonal display. The flowers can be changed later, allowing the same book to be updated throughout the year.
Choose books that are damaged, outdated, duplicated or already destined for donation rather than cutting apart something valuable or sentimental.
Best for: Book clubs, seasonal gatherings and smaller craft groups
Host preparation: Provide appropriate books and hot glue, then demonstrate the first few cuts and folds
Mess level: Medium because of the trimmed paper
Estimated craft time: 60–90 minutes per book
Guests take home: A flower centerpiece or wall decor piece
This project requires a little more precision than painting pots or arranging rhinestones. It is a better fit for a group that enjoys following a process and working with its hands.
Watch | How I turned an old book into a flower centerpiece or wall decor piece and shop the supplies.
5. Mini Photo-Frame Magnets
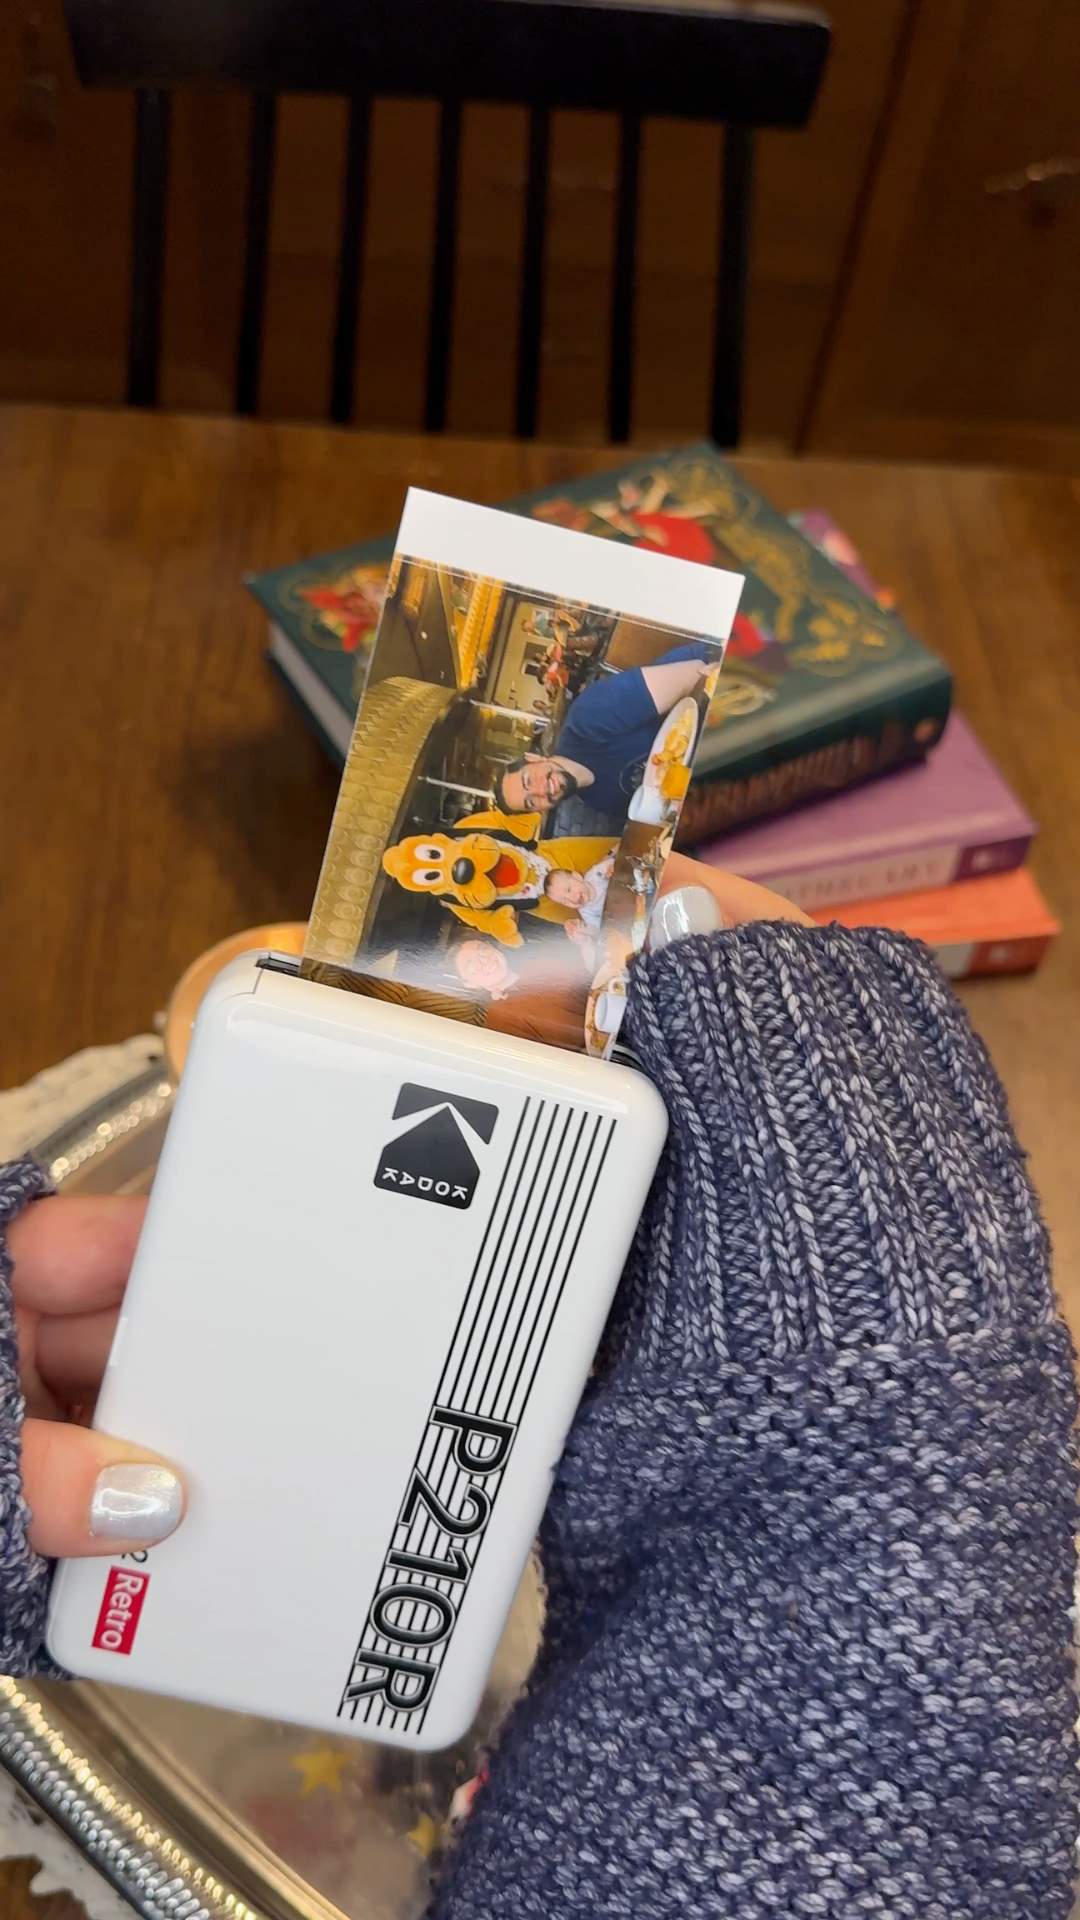
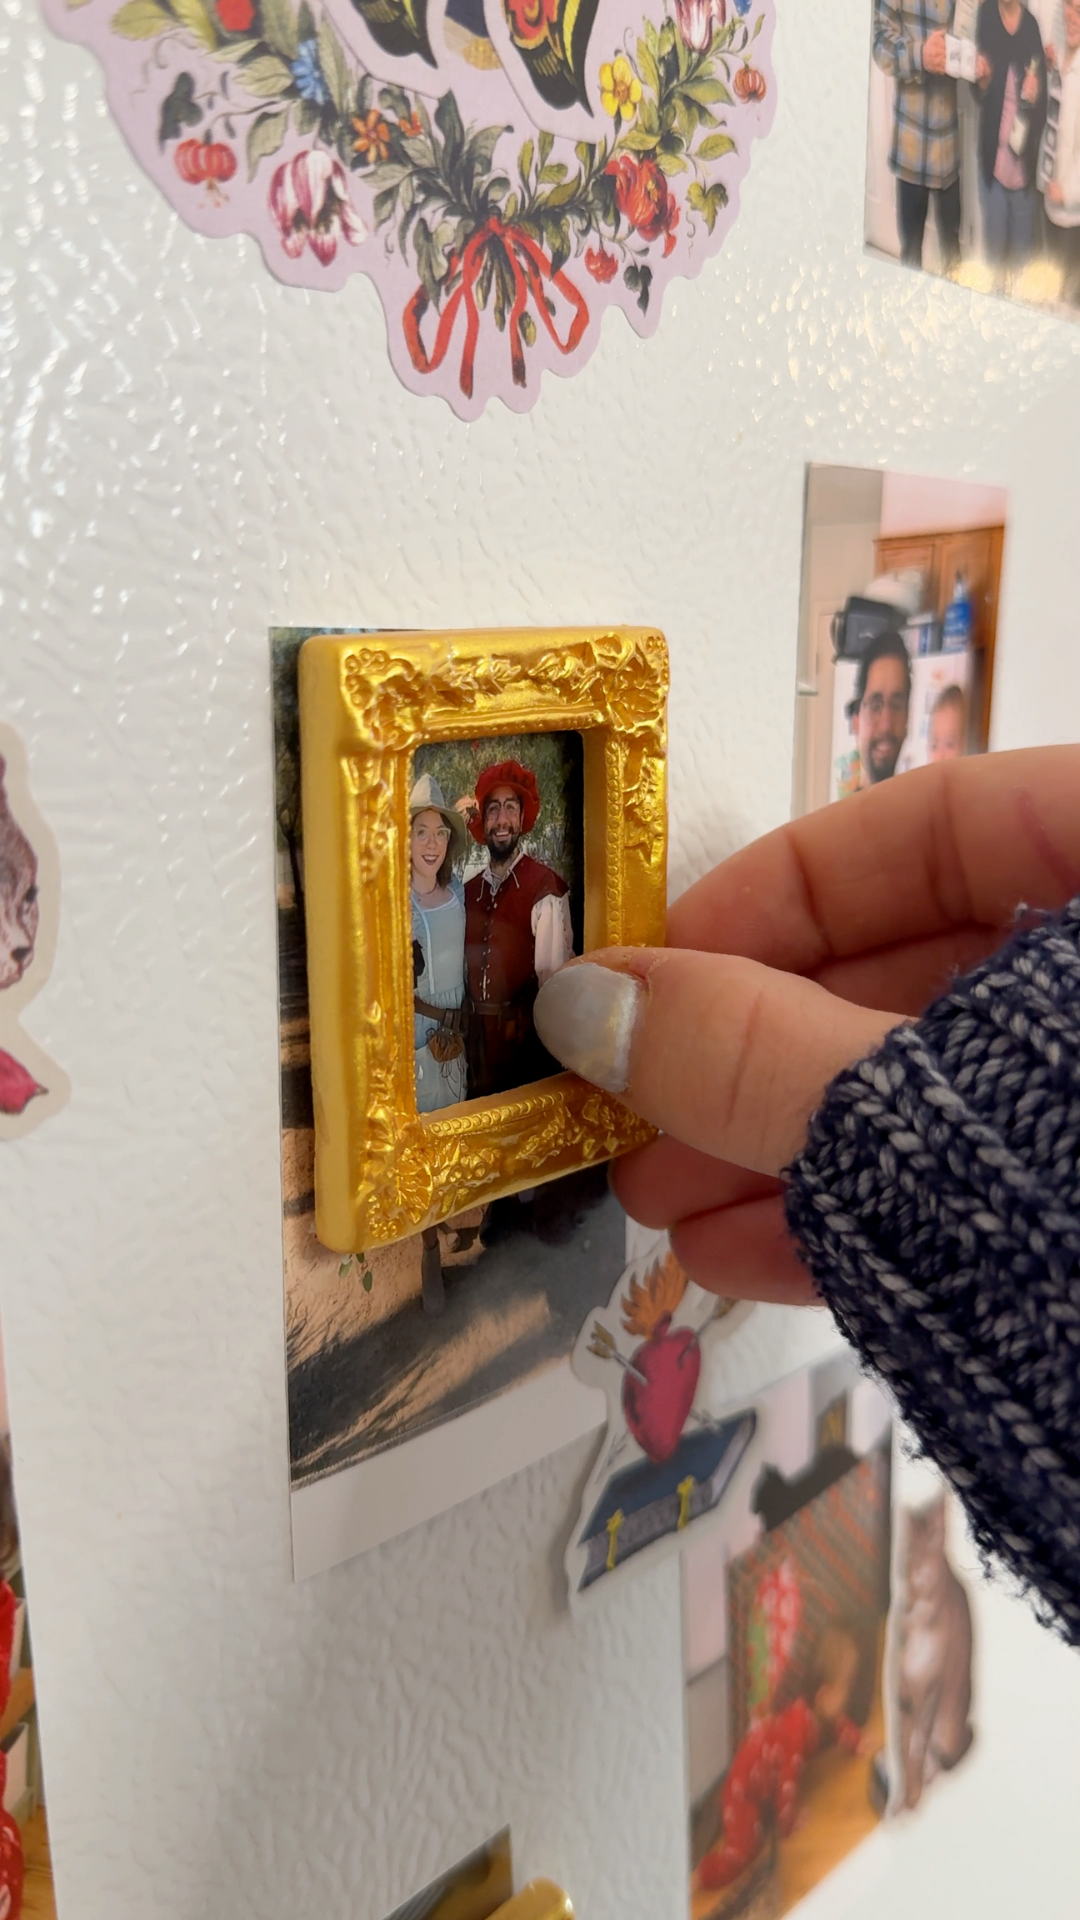
Mini photo-frame magnets are small, charming and easy to make in multiples.
I originally made mine as part of a scrapbook-style photo display for my refrigerator. Tiny resin frames were turned into magnets by attaching small craft magnets to the backs with hot glue.
The main trick is keeping every magnet at the same height. After placing a small dot of hot glue on the frame, I press the magnet down with a flat object while the glue sets. This helps the finished frame sit evenly against the refrigerator instead of rocking or tilting.
Guests can bring printed photos, or the host can provide decorative paper, tiny art prints and bookish images to place inside the frames.
Best for: Family gatherings, memory-themed parties and quick craft nights
Host preparation: Print photos in advance or ask guests to bring their favorites. Provide the frames, magnets and hot glue.
Mess level: Low
Estimated craft time: 30–60 minutes for five to ten magnets
Guests take home: A collection of tiny framed magnets
This is also a practical option for a crowded table. The materials take up very little room, and guests can continue talking while assembling their frames.
Watch & Shop | How I made the mini photo-frame magnets and shop the supplies.
6. Handmade Clay Candleholders
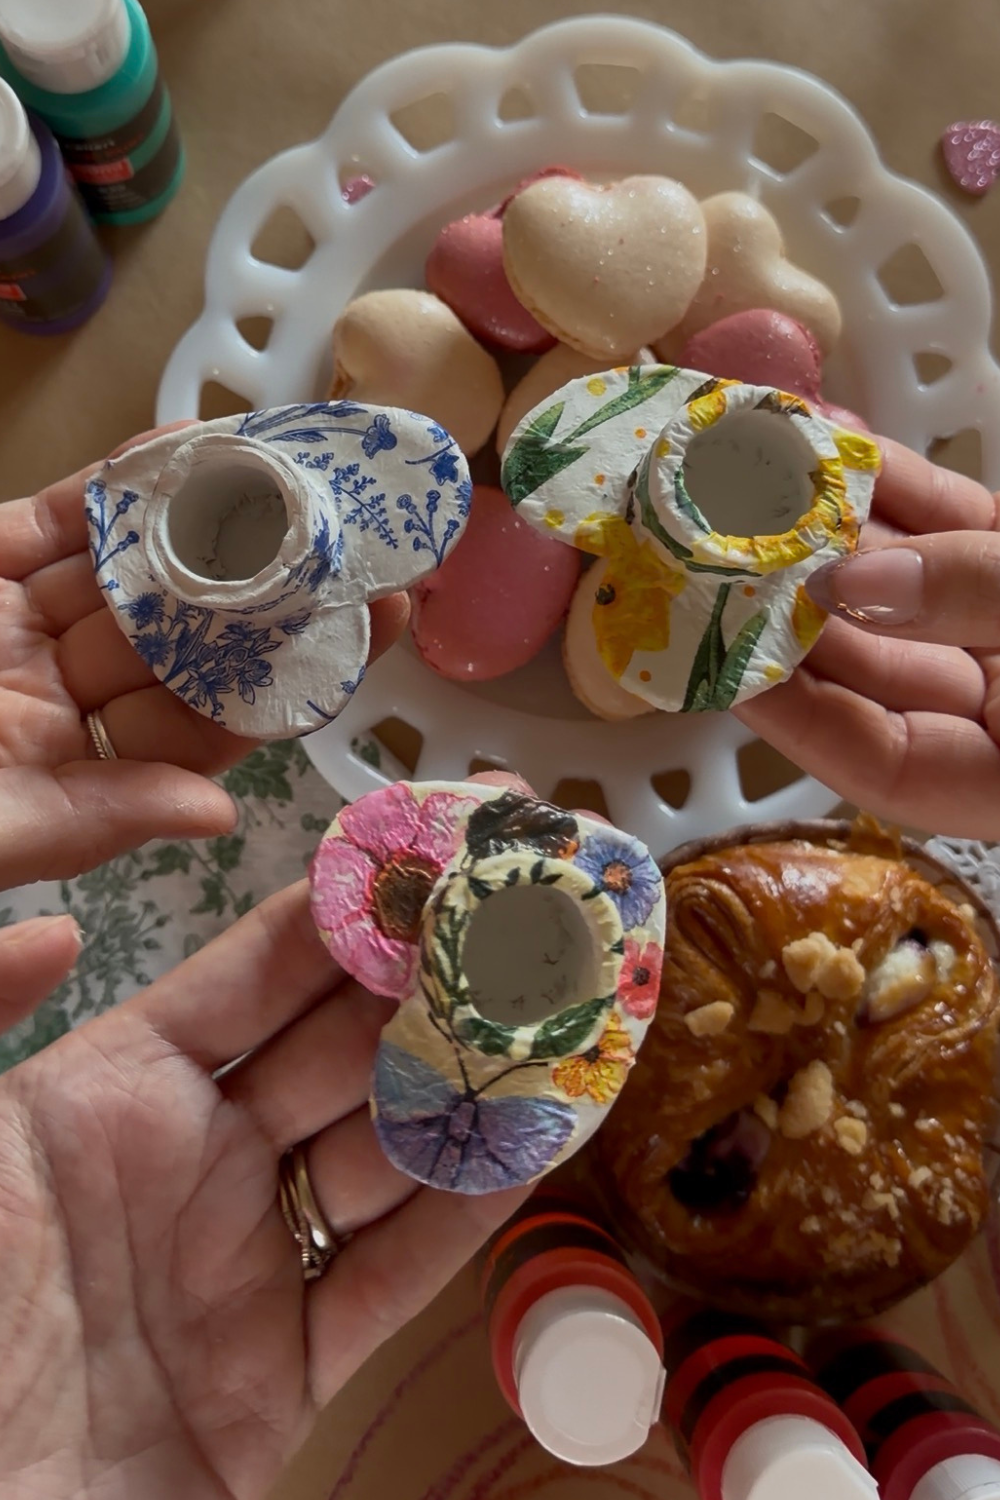
My heart-shaped candleholders are made from air-dry clay and decorated with patterned napkins, Mod Podge and ribbon.
This craft works best when the host prepares the clay bases before the gathering. The heart base and candle ring need to be shaped and given several days to dry completely.
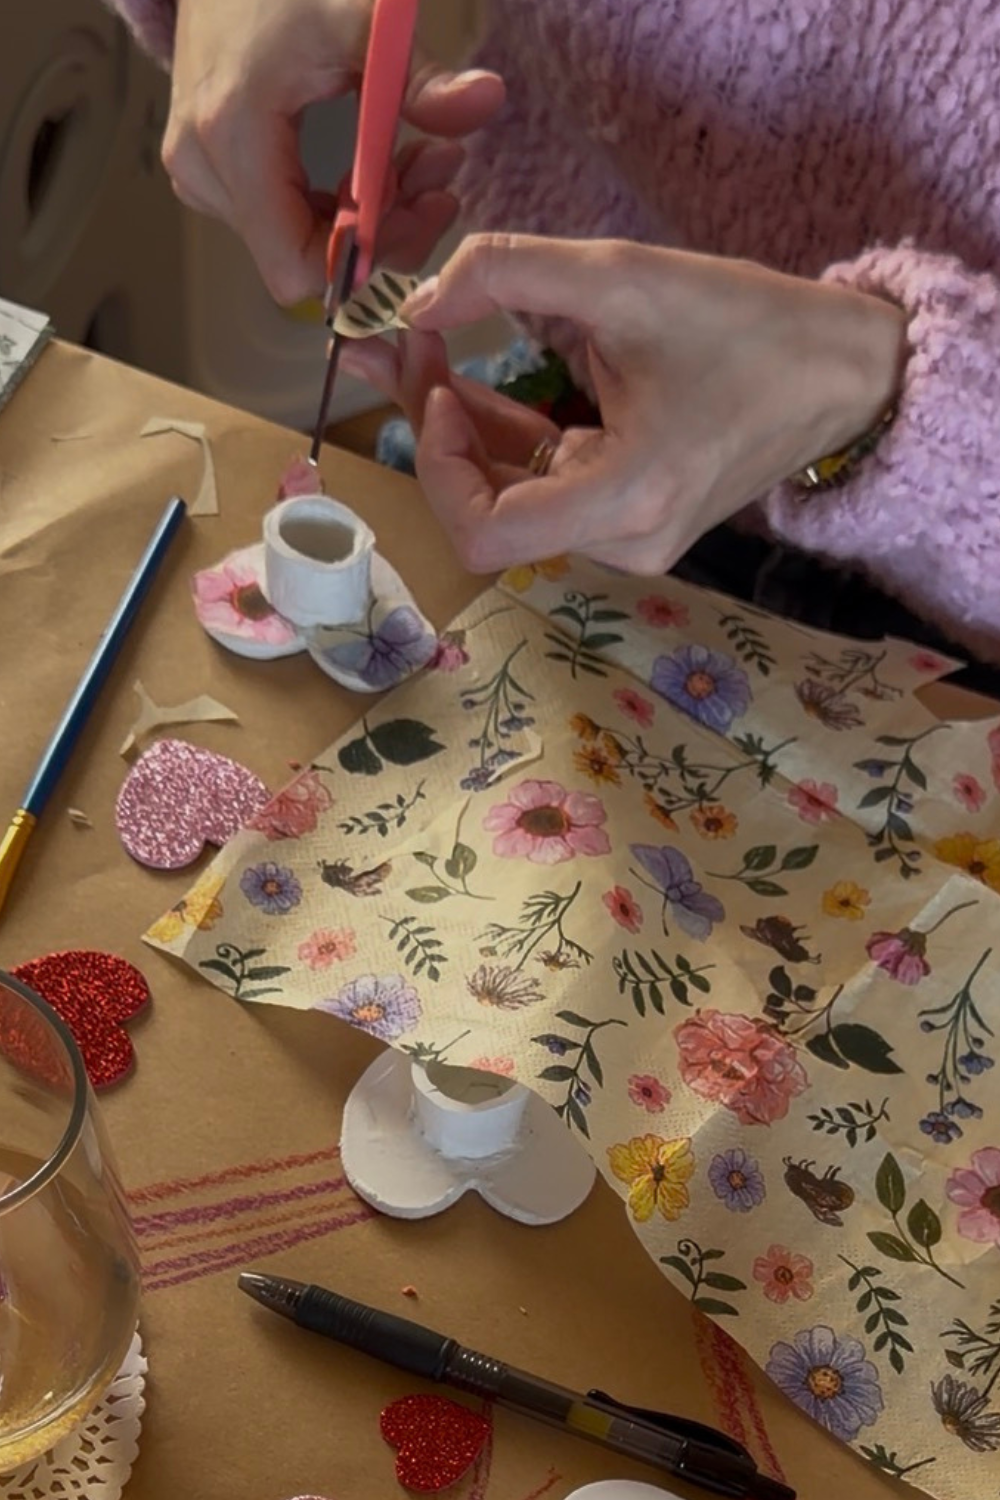
Once guests arrive, they can move directly to the enjoyable part: choosing floral napkins, cutting out designs and decoupaging their candleholders.
Best for: Galentine’s parties, bridal gatherings and hosts who enjoy preparing in advance
Host preparation: Make the clay bases three to four days before the event
Mess level: Medium
Guest decoration time: Approximately 15–30 minutes per candleholder
Guests take home: A handmade taper candleholder
Preparing the bases ahead keeps guests from spending the party shaping wet clay and then waiting for it to dry. Everyone still gets to personalize the part of the project that will be most visible in the home.
The same idea can also be adapted beyond hearts. Use a different cookie cutter to match a holiday, season or party theme.
Watch & Shop | Follow along with the handmade clay candleholder video and shop the supplies.

7. Charm-Chain Bookmarks
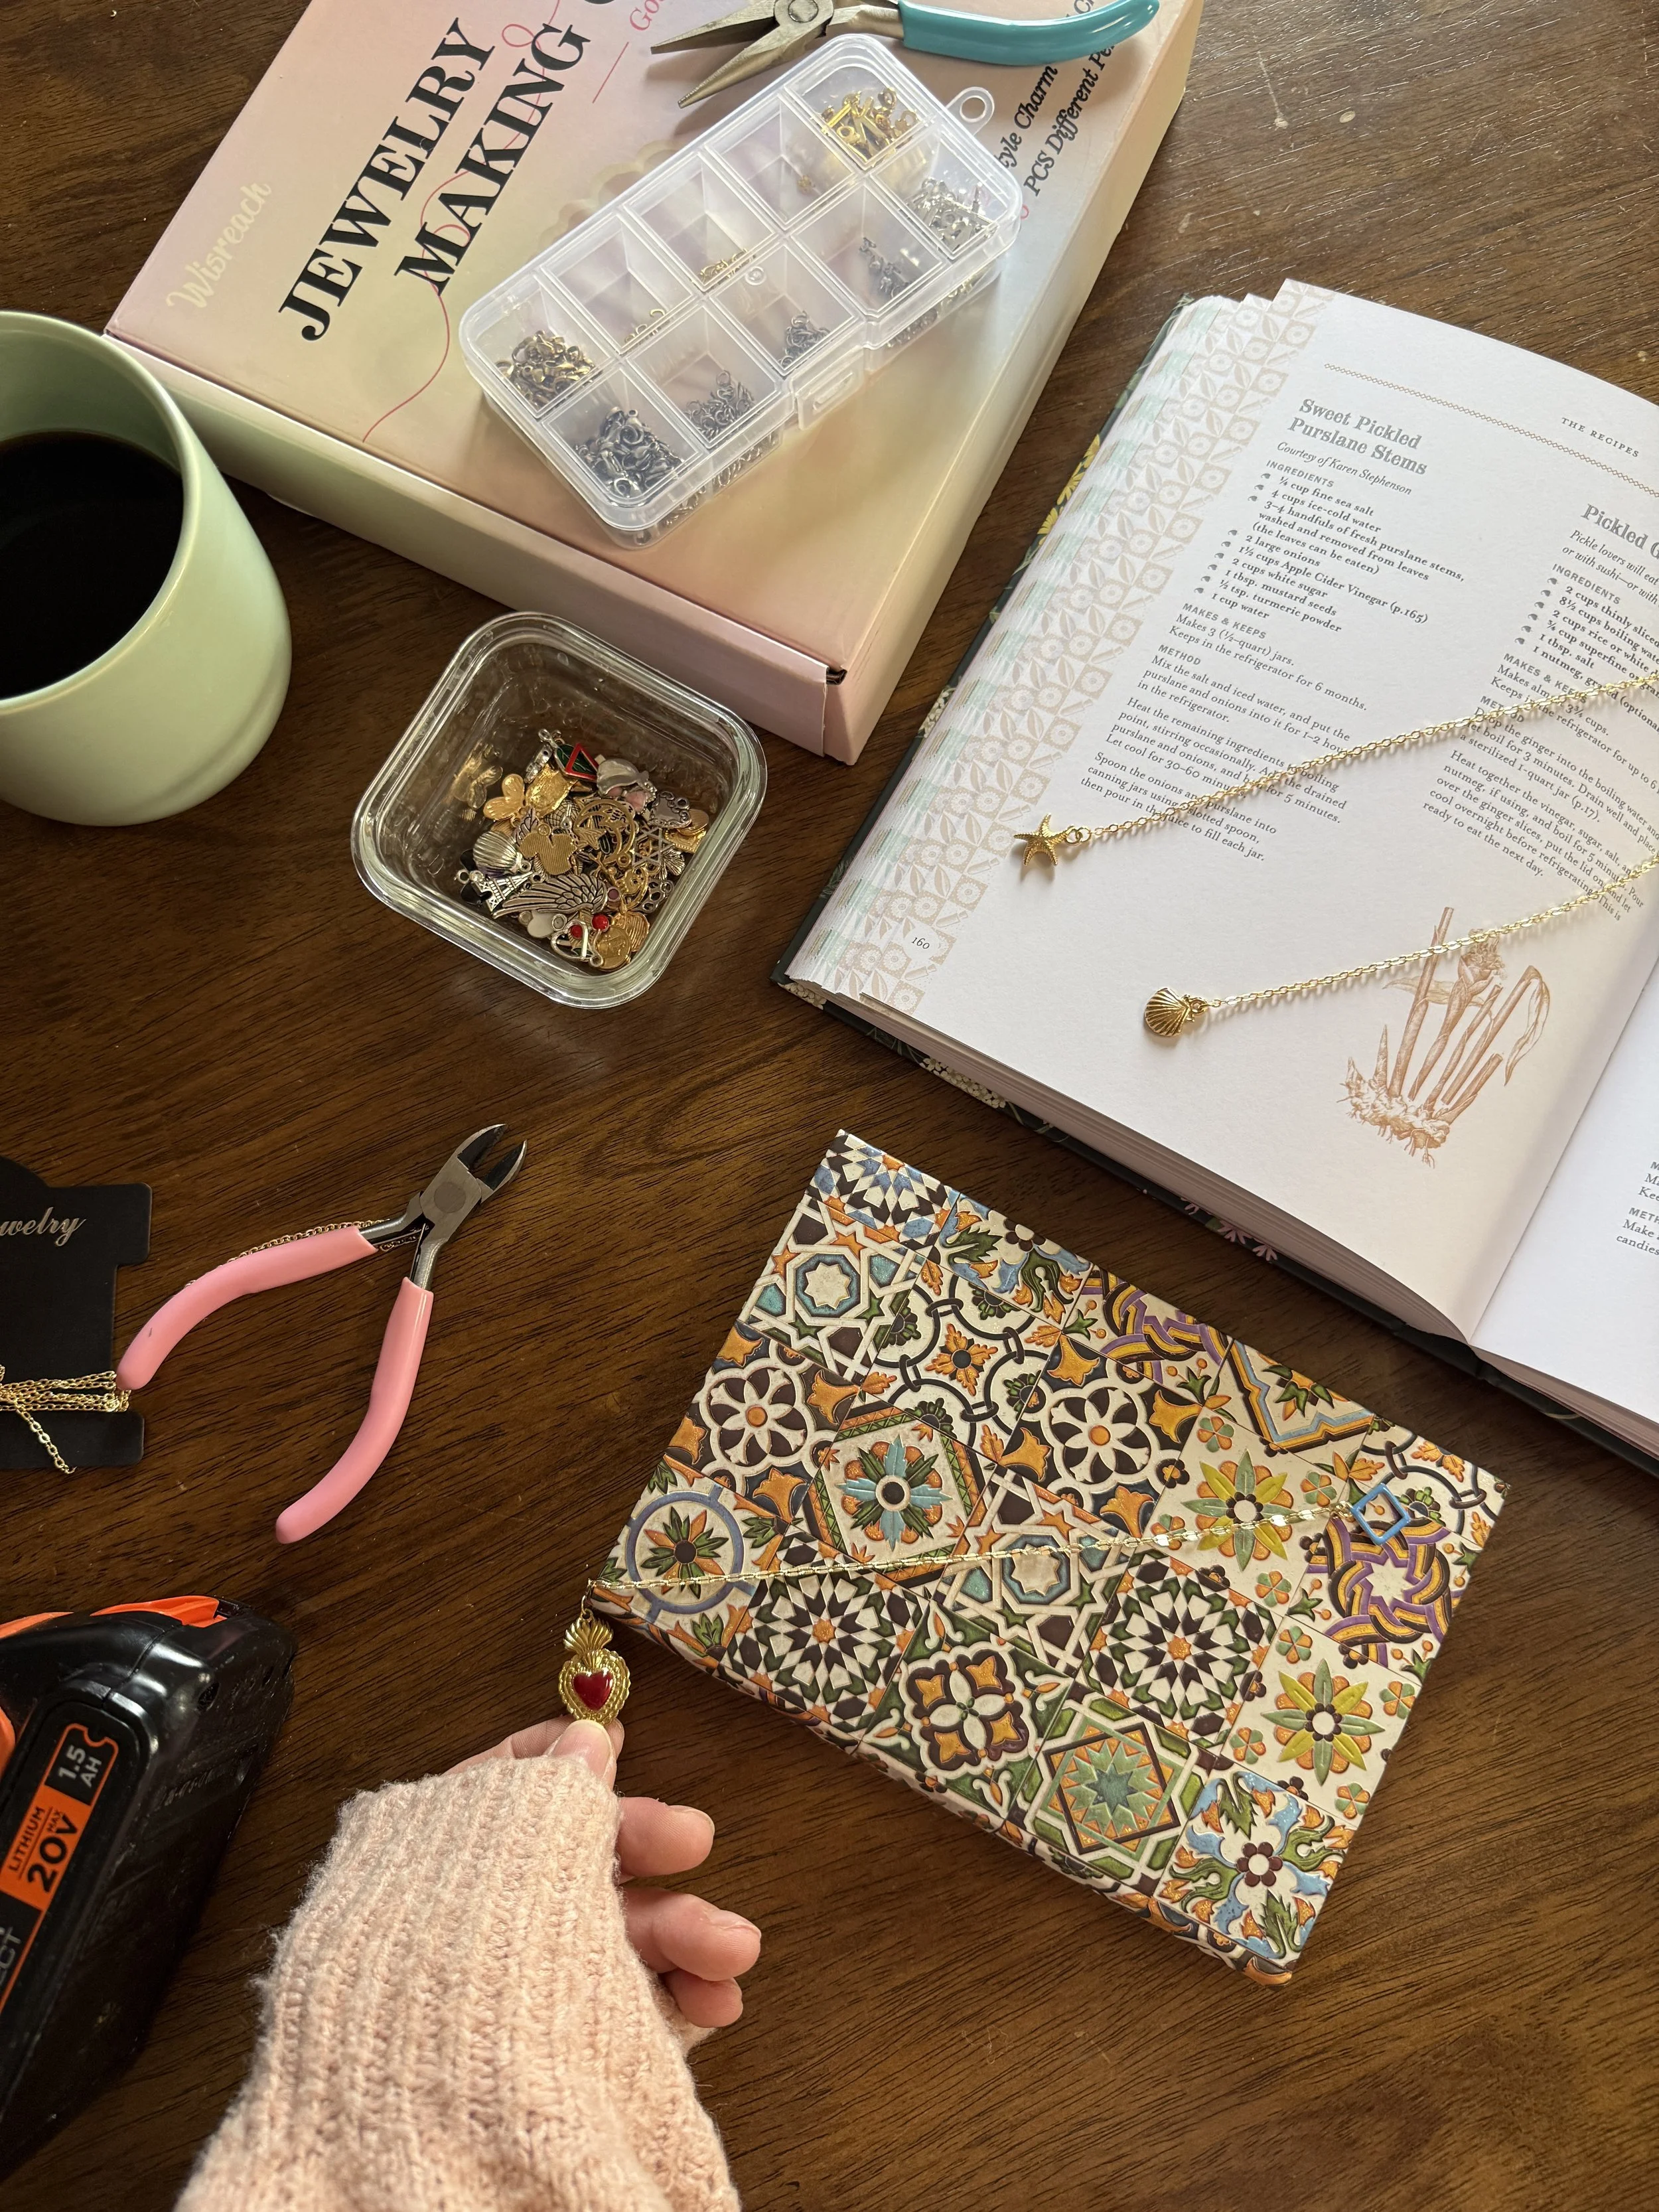
A charm-chain bookmark adds a decorative chain directly to the spine of a book or journal.
I made mine by carefully drilling a small hole near the top of the spine, adding a jump ring and attaching a chain with a charm. The chain rests between the pages as a bookmark while the charm remains visible outside the book.
This works especially well when personalizing a book you already own, decorating a journal or adding a handmade detail to a book you plan to give as a gift.
Guests can choose charms that match the title, genre, journal theme or person receiving it.
Best for: Book clubs, handmade gifts and small groups
Host preparation: Collect the books or provide journals, then drill one hole near the top of each spine before the gathering. Set out the jewelry findings, chains and charms for guests.
Mess level: Low
Craft time: Relatively quick once the holes have been drilled
Guests take home: A personalized book or journal with an attached chain bookmark
Because this project involves a drill, I would collect the books in advance or provide the journals myself. That allows all of the holes to be drilled beforehand so guests can focus on choosing and assembling their charm combinations.
Watch & Shop | How I added a charm-chain bookmark to a book or journal and shop the supplies.
How to Choose a Craft for Different Skill Levels
For a group with a wide range of experience, choose a project that can be made as simple or detailed as each person wants.
The most flexible options are:
Bedazzled compact mirrors
Painted terracotta pots
Fruit-printed tote bags
Mini photo-frame magnets
The book arrangement and charm-chain bookmark require a little more precision. The candleholder project requires more work from the host before the event.
It also helps to make one example before everyone arrives. The example should show how the materials work without becoming a design everyone feels obligated to copy.
How to Set Up a Girls’ Craft Night
Complete as much logistical work as possible before guests arrive.
Cover the table, separate shared supplies and place the basic materials at each seat. Keep extra brushes, glue, paper towels and small trash containers nearby.
For projects with a drying, cutting or construction stage, complete as much of that work as possible ahead of time. Guests should be able to sit down and begin the creative portion without waiting for clay to dry, fruit to be cut or holes to be drilled.
Snacks and drinks are part of the setup, but keep them on a separate surface when using paint, hot glue or small jewelry findings.
Most of these projects fit comfortably into a one-to-three-hour gathering. Choose one main craft rather than setting out seven full stations. A few optional finishing materials are enough to give everyone choices without overwhelming the table.